Lambda Technical Papers
Search technical papers
“(No. 292) “Stress Relaxation in Powder Metallurgy Superalloy Disks
T. P. Gabb, J. Telesman, NASA Glenn Research Center
P. T. Kantzos, Ohio Aerospace Institute
P. J. Bonacuse, R. L. Barrie, Army Research Laboratories
D. Hornbach, Lambda Technologies
Modern powder metallurgy (PM) processed disk superalloys have improved mechanical properties and temperature capabilities over previous cast and wrought disk alloys, due to improved microstructural uniformity and higher refractory element contents. However, these PM improvements have been accompanied by increased sensitivities to notches and defects at disk surfaces. These surface sensitivities can be addressed by applying beneficial compressive residual stresses at disk surfaces. The compressive residual stresses are produced with surface enhancement processes such as shot peening which plastically deform the near-surface material, usually performed after final disk machining. Such compressive residual stresses… (See the full paper)
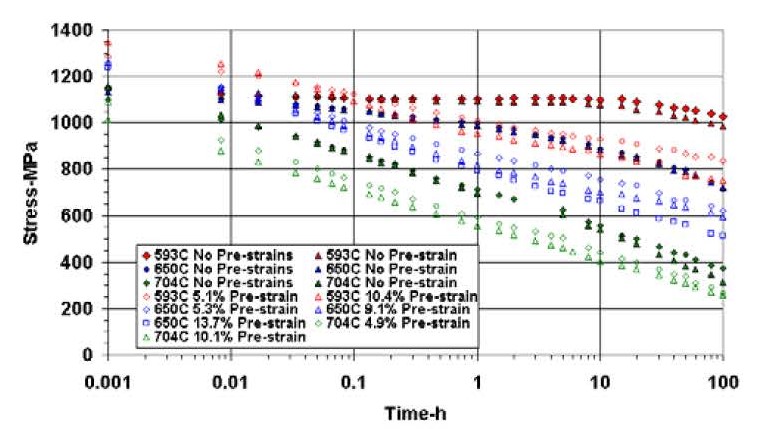
Specimen Tensile Stress Relaxation Results
(No. 291) “An Investigation of the Formation of Crack-Like Intergranular Fissures in 7000 Series Aluminum by Grain Boundary Galvanic Corrosion”
Kyle Brandenburg, Douglas Hornbach, N. Jayaraman and Paul Prevey, Lambda Technologies
The present study builds upon the work of Maitra and English, and postulates that anodic polarization of a galvanic couple falling between two breakdown potentials could cause significant intergranular corrosion but minimal general pitting of the matrix of 7000 series aluminum alloy. The crack-like intergranular fissures, visually similar to stress corrosion cracking (SCC) or intergranular cracking (IGC), would be difficult to detect and independent of applied or residual stress. Component failure initiating from the fissures could be incorrectly identified as SCC. SCC mitigation by the introduction of surface compressive residual stresses would be… (See the full paper)

Composite SEM Images Showing SCC-like Damage from Galvanic Exposure
(No. 290) “Improving Fatigue Life of Ductile Cast Iron via Surface Enhancement”
Perry Mason, Kyle Brandenburg and Douglas Hornbach, Lambda Technologies
Ductile cast irons can be used in a variety of applications from statically loaded structural supports to various dynamically loaded components. Ductile cast iron can be substituted for steel and can be utilized at a cost savings due to its ability to be easily cast and machined. Ductile cast iron applications could be further broadened if the fatigue properties were further enhanced. Shot peening has been widely used to increase fatigue performance by imparting a layer of compressive residual stress. Deeper and higher magnitude compression, such as that obtained by Low Plasticity Burnishing (LPB), could further improve performance and reduce the occurrence of premature failure. During this investigation, high cycle fatigue (HCF) tests were conducted on 80-55-06 ductile cast iron. The fatigue performance was evaluated for ground, shot peened, and LPB processed samples. Testing was conducted with surface damage… (See the full paper)
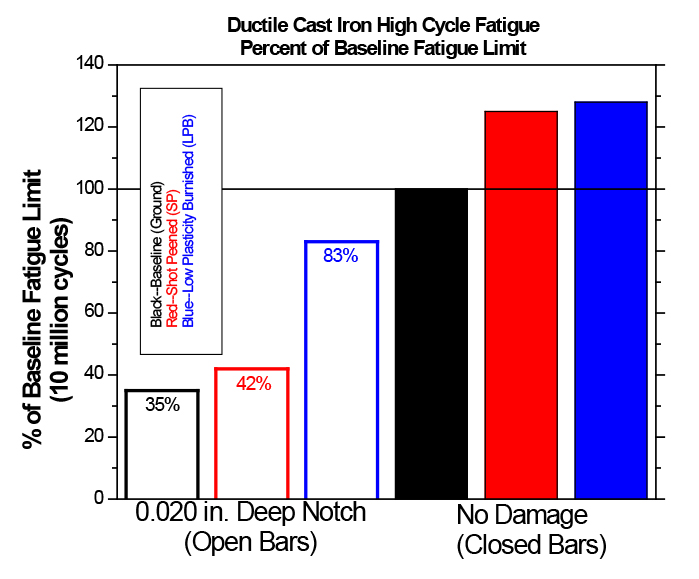
High Cycle Fatigue Results of Ductile Cast Iron Specimens Plotted as a Percentage of the Baseline Fatigue Limit
(No. 289) “Residual Stress in Pipelines”
Paul Prevey and Douglas Hornbach, Lambda Technologies
Oil and Gas Pipelines: Integrity and Safety Handbook, First Edition. ASM International, Edited by R. Winston Revie. 2015 John Wiley & Sons, Inc. Ch 7.
This chapter is intended to provide an overview of residual stresses for engineers engaged in the design, installation, and maintenance of pipelines. Residual stresses introduced into pipelines by welding and forming during assembly, installation, or repair and their effect on service life are often overlooked. The goal of this chapter is to provide a general presentation of residual stresses, how they relate to applied stresses, and their influence in service performance of pipe-lines and related applications. Avoiding creating detrimental tension when possible and dealing with unavoidable tension by thermal stress relief or the introduction of beneficial compression for improved performance are covered. The effects of residual stresses on stress corrosion cracking (SCC) and fatigue failure mechanisms are briefly discussed… (See the full paper)
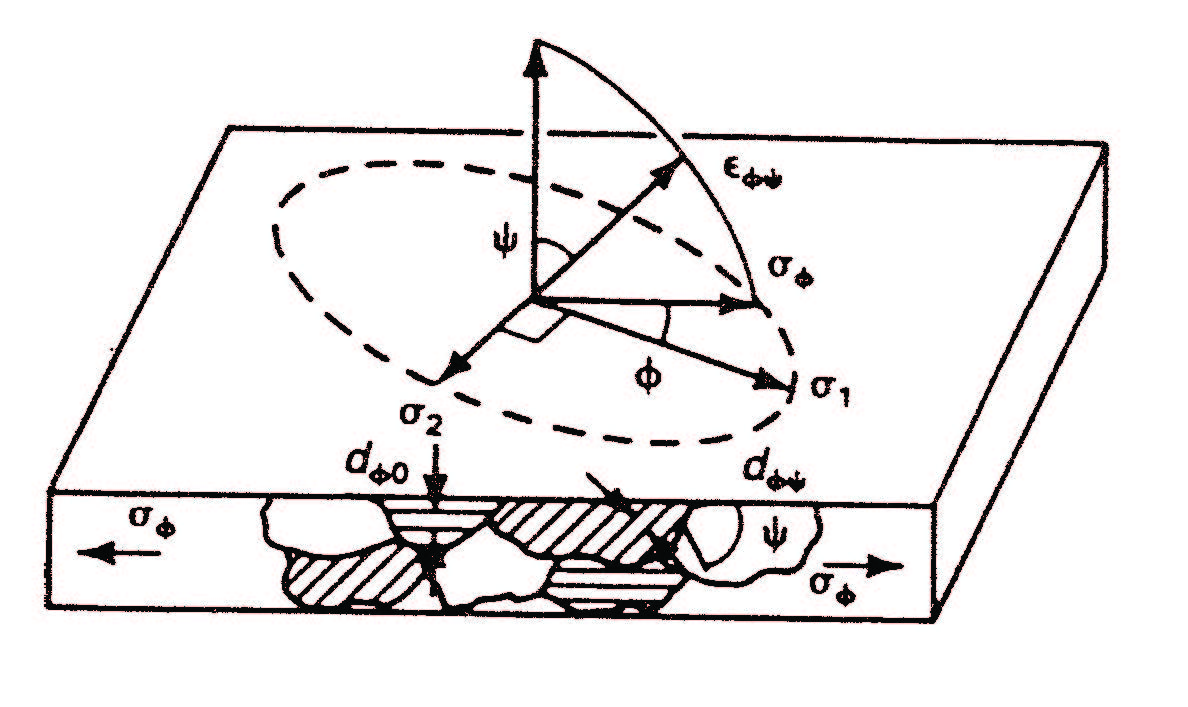
Plane Stress Elastic Model
(No. 288) “Mitigation of Fretting Fatigue in Ti-6Al-4V Through Surface Enhancement”
Dr. Jayaraman, Director of Materials Research, Lambda Technologies
Failure from fretting fatigue affects aircraft engine rotors and blades at the blade dovetail disk post contact faces. A clear understanding of the fundamental mechanisms involved in the mode II shear micro crack initiation, mode I crack propagation and final failure has evolved through many studies. Although a number of test methods with axially loaded specimens, 4-point bend specimens and dovetail features specimens have been used in the various studies, excellent correlation is noted between test results. While earlier studies focused on the mitigation of crack initiation mechanism through coatings and lubrication, the effectiveness of surface compressive residual stress technologies like low plasticity burnishing (LPB) and laser shock peening (LSP) to completely shut down the mode I crack growth process is highlighted. LPB applications to specific engine rotor and blade to mitigate fretting fatigue are described.. (See the full paper)
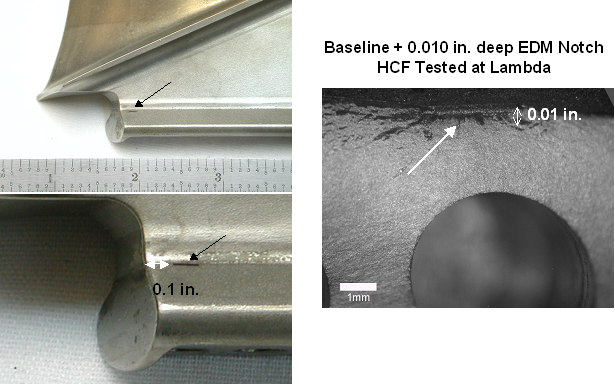
Fretting Prone Locations
(No. 287) “Use of Engineered Compressive Residual Stresses to Mitigate Stress Corrosion Cracking and Corrosion Fatigue in Sensitized 5XXX Series Aluminum Alloys”
Kyle A. Brandenburg, Project Engineer, Lambda Technologies
Douglas J. Hornbach, CEO Lambda Research
Perry W. Mason, Laboratory Manager, Lambda Technologies
Proceedings of Department of Defense Virtual Corrosion Conference 2013, Pretreatments.
September 16-17, 2013.
Tests were conducted to characterize the effect of LPB on CF and SCC in sensitized and unsensitizedAA5083-H116 test samples. Residual stress measurements were performed to quantify the magnitude and depth of the residual compression from the LPB process. Samples were high cycle fatigue tested while exposed to simulated seawater consisting of 3.5% weight NaCl in distilled water. Samples were exposed to accelerated corrosion damage via SCC and alternate immersion tests to introduce pitting and general corrosion damage prior to fatigue testing. LPB provided up to 100X improvement in fatigue life and up to 3.5X improvement in fatigue strength over the untreated condition. (See the full paper)
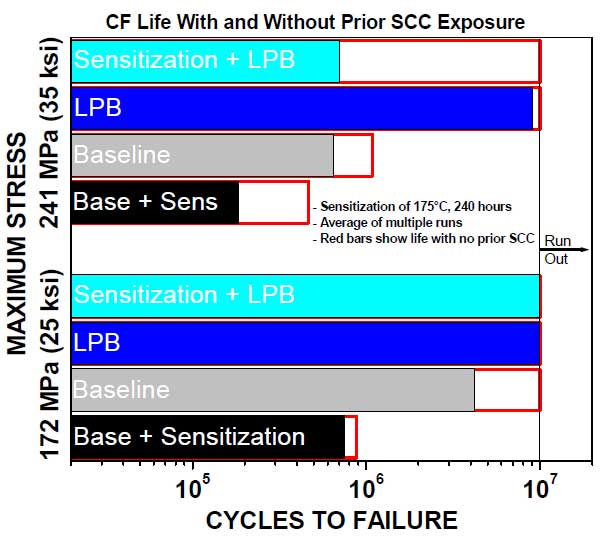
High cycle fatigue results for samples with and without SCC exposure.
(No. 286) “The Effect of Surface Enhancement on Improving the Fatigue and Sour Service Performance of Downhole Tubular Components”
Jeremy E. Scheel, Research Engineer, Lambda Technologies
Douglas J. Hornbach, Vice President, Director of Laboratory Operations, Lambda Technologies
Proceedings of the ASME 2012 International Mechanical Engineering Congress & Exposition, Houston, TX. November 9-15, 2012, IMECE2012-87482.
Sulfide stress cracking (SSC) and hydrogen embrittlement (HE) prevent the use of high strength carbon steel alloys in the recovery of fossil fuels in H2S containing ‘sour’ environments commonly experienced in deep well fossil fuel recovery efforts. Couplings are a common weak point in casing strings as high magnitude mean tensile stresses are generated by connection interferences created during power make-up of downhole tubular components. When subject to service loads both mean and alternating stresses are increased further providing the high tensile stresses necessary for SSC initiation. Since high strength carbon steel alloys are not typically suited for sour service environments, the current solution is to use or develop much more expensive alloys with increased corrosion-cracking resistance, or limit their use to significantly weaker sour environments, or higher operating temperatures.
The effects of LPB on high cycle fatigue (HCF) and SSC were evaluated on quench and tempered API P110 grade steel. LPB processed specimens had an increase in fatigue life greater than an order of magnitude over untreated specimens. LPB was successful in completely mitigating SSC in all test specimens at tensile stresses up to 90% specified minimum yield strength (SMYS). The initial results indicate that LPB processing of P110 steel provides an economical means of SSC mitigation and fatigue strength improvement in sour environments. (See the full paper)
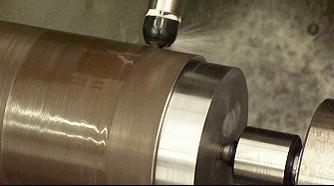
API-P110 Coupling Being LPB Processed on a CNC Lathe
(No. 285) “Improving Corrosion Fatigue Performance & DamageTolerance of 410 Stainless Steel via LPB”
Jeremy E. Scheel, Research Engineer, Lambda Technologies
Douglas J. Hornbach, Vice President, Director of Laboratory Operations, Lambda Technologies
Proceedings of PowerGen 2012, Session 11C1, Steam Turbine Reliability, Availability and Efficiency. Orlando, FL, December 11-13, 2012.
Corrosion fatigue (CF) and stress corrosion cracking (SCC) of stainless steel components can lead to reduced availability of steam turbines ST). Significant operation and maintenance (O&M) costs are associated with CF and SCC prevention in both aging and new higher efficiency ST systems. Shot peening has been used to reduce the overall operating tensile stresses however corrosion pits and other damage can penetrate the relatively shallow residual compression providing initiation sites for SCC and CF. A means of reliably introducing a deep layer of compressive residual stresses in critical ST components will greatly reduce O&M costs by extending the service life of components. Low plasticity burnishing (LPB) is an advanced surface enhancement process providing a means of introducing compressive residual stresses into metallic components for enhanced fatigue, damage tolerance, and SCC performance. High cycle fatigue tests were conducted on Type 410 stainless steel, a common alloy used in critical ST components, to compare the corrosion fatigue benefits of LPB to shot peening. Samples were tested in an active corrosion medium of 3.5% weight NaCl solution. Mechanical or accelerated corrosion damage was placed in test samples to simulate foreign object damage, pitting damage and water droplet erosion prior to testing. High cycle fatigue and residual stress results are shown. Residual compression from LPB was deeper than the damage in the samples providing a nominal 100X improvement in fatigue life compared to the shallow compression from SP. Polarization testing conducted on LPB and SP test samples are shown. The polarization results reveal a nominal 20X higher corrosion rate in the highly cold worked SP condition as compared to the lower cold worked LPB condition. Life extension from LPB offers significant O&M cost savings, improved reliability, and reduced outages for ST power generators. (See the full paper)
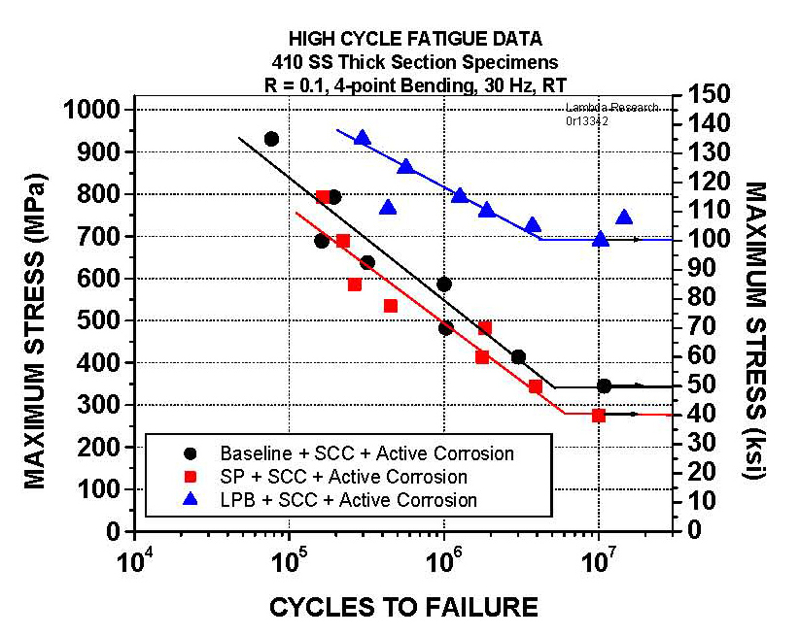
High Cycle Fatigue Results for Specimens with SCC and Active Corrosion
(No. 284) “Prevention of Corrosion Related Failure of Aircraft Aluminum Using an Engineered Residual Stress Field”
Jeremy E. Scheel, Research Engineer, Lambda Technologies
Douglas J. Hornbach, Vice President, Director of Laboratory Operations, Lambda Technologies
Paul S. Prevéy, President, Director of Engineering, Lambda Technologies
Presented at the DoD Corrosion Conference, Palm Springs, CA. July 31 – August 5, 2011.
The effect of corrosion damage on the high cycle fatigue (HCF) performance of AA7075-T6 alloy was evaluated. Corrosion fatigue specimens were processed using either a conventional 6-8A, 200% shot peening (SP) treatment or low plasticity burnishing (LPB), a CNC controlled process capable of being performed robotically ‘on wing’ as well as with conventional CNC machine tools. Stress vs. life corrosion fatigue curves were established for each process; pitting depth and anodic polarization studies were also performed. Residual stress measurements were performed to quantify the magnitude and depth of residual compression from each process. LPB imparted a depth of compression 3X greater than SP without the severe cold working produced by SP. The corrosion fatigue life for LPB specimens was increased by greater than an order of magnitude over SP. Pit depths were measured as a function of time and were found to approach a maximum depth dependent upon the surface treatment used. Anodic polarization testing revealed a shift in the open circuit potential (OCP) of nominally 0.12 V between SP and LPB treated specimens. The LPB specimens were found to be nobler, having a lower OCP than the SP specimens. Corrosion damage exceeding the depth of compression on a component served as the nucleation point(s) for corrosion induced fatigue cracking. A deep, stable layer of engineered residual compression can successfully mitigate corrosion damage and greatly increase corrosion fatigue life. (See the full paper)
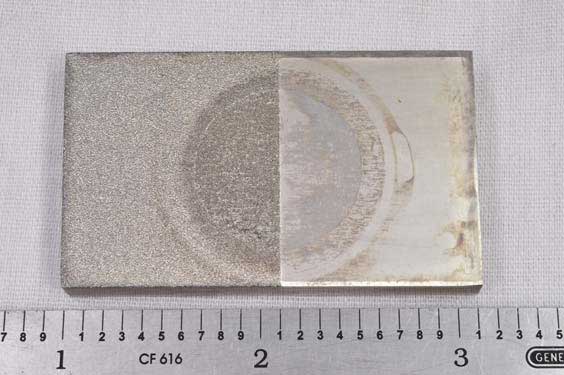
A7075-T6 coupon after anodic polarization testing in 3.5% NaCl purged with N2. The highly cold worked SP area was pitted and corroded while the low cold worked LPB area was discolored with minor pitting.
(No. 283) “Management of Residual Stress: An Emerging Technology for Oil Industry Tubular Products”
Darrel Chelette, U.S. Steel Tubular Products, Inc.
Pete W. Moore, U.S. Steel Tubular Products, Inc.
Xin Long, U.S. Steel Tubular Products, Inc.
Jeremy E. Scheel, Research Engineer, Lambda Technologies
Douglas J. Hornbach, Vice President, Director of Laboratory Operations, Lambda Technologies
Presented at Offshore Technology Conference Brasil, Rio de Janeiro, Brazil. 4–6 October 2011.
The role of residual stress in the performance properties of tubular products is increasingly coming under renewed interest. A historical review shows how tubular manufacturing standards have added straightening and stress relief requirements to minimize residual stress. International technical reports focusing on performance equations have included a residual stress term for tubular collapse performance. Research summaries concerning full size testing of casing in saturated H2S liquid environment have reported the significant impact of tensile residual stress in the propagation of surface notches.Recent technology advancements in the aviation, medical and nuclear industries have resulted in effective ways to strategically place deep, stable residual stress fields into metal structures to greatly improve damage tolerance and to mitigate fatigue cracking and environmental-assisted cracking. Engineered placement of residual stress fields in oil country tubular products, drill pipe, and line pipe hasreached the research and testing phase.This paper also presents a review of residual stress formation during manufacture and as a factor in tubular performance, a review of advanced processing techniques in managing residual stress, and a review of recent performance testing on tubular components incorporating near yield strength compressive residual stress fields. (See the full paper)
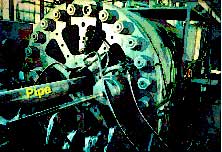
A. O. Smith radial compressor, Lone Star, Texas
(No. 282) “LPB as a Crack Initiation Resistant Process for Case Hardened Steels”
Jeremy E. Scheel, Research Engineer, Lambda Technologies
Douglas Christensen, Lambda Technologies
N. Jayaraman PhD, Director of Materials Research, Lambda Technologies
The high cycle fatigue performance of case carburized 9310 rotorcraft gear steel was investigated with shot peening (SP), low plasticity burnishing (LPB), and as-ground surface conditions to compare the relative resistance to crack initiation. A 0.010 in. (0.25 mm) EDM notch was used to simulate damage frequently encountered in rotorcraft gears such as contact fretting induced pitting. In the smooth (undamaged) condition LPB leads to a 10% improvement in fatigue strength over SP and a 20% improvement overthe as-ground condition, and in the presence of simulated damage, to a 100% improvement over SP. Residual stress relaxation due to both mechanical and thermal exposure was also investigated. Both LPB and SP lead to similar residual stress relaxation on the surface after a single cycle of mechanical overload. Below the surface, SP leads to either a complete relaxation of the residual compression or a transition into residual tension after the overload cycle, while LPB leads to stable compressive residual stresses. This study paves the way for developing applications of LPB technology for rotorcraft gear components by appropriate design of LPB tools and implementation of the designed residual stresses to improve the fatigue performance and damage tolerance. (See the full paper)
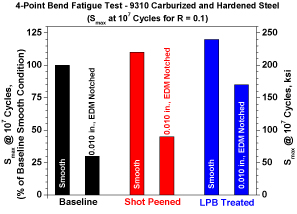
LPB more than doubled the life with damage.
(No. 281) “Fatigue Life Extension of Steam Turbine Alloys Using Low Plasticity Burnishing”
Ravi Ravindranath, NAVAIR, Patuxent River, MD, USA
Douglas J. Hornbach, Vice President, Director of Laboratory Operations, Lambda Technologies
N. Jayaraman PhD, Director of Materials Research, Lambda Technologies
Proceedings of ASME Turbo Expo 2010: Power for Land, Sea and Air. Glasgow, UK. GT2010-22995, June 14-18, 2010.
Low Plasticity Burnishing (LPB) dramatically improves the damage tolerance of titanium alloy blades, mitigating blade disk dovetail fretting and blade edge damage in gas turbines. LPB surface treatment of martensitic stainless steels Alloy 450 and 17-4PH subject to corrosion fatigue and pitting in the low-pressure sections of stream turbines has now been investigated. Condensation in the low-pressure steam turbine environment supports corrosion pitting and corrosion fatigue in martensitic stainless steels, primary failure mechanisms driving steam turbine repair and operational expense. Chloride corrosion fatigue results with and without high kf surface damage are compared for LPB, shot peened, and machined 17-4PH; and for ground and LPB-treated Alloy 450. The depth and magnitude of compression achieved by the surface treatments are documented. LPB increased the undamaged fatigue strength of 17-4PH by 30% in neutral salt solution, and of Alloy 450 in acidic salt by 50%. In both alloys LPB mitigated damage to the 1 mm depth of compression. The cyclic stress corrosion component of corrosion fatigue was eliminated by the deep LPB compression, effectively restoring the endurance limit lost in active corrosion fatigue in both alloys. (See the full paper)
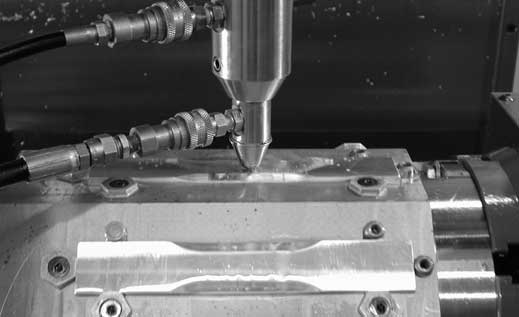
A fatigue specimen being LPB processed in a 4-axis CNC milling machine.
(No. 280) “Mitigation of Sulfide Stress Cracking in Down Hole P110 Components via Low Plasticity Burnishing”
Darrel Chelette, U.S. Steel Tubular Products, Inc.
Pete W. Moore, U.S. Steel Tubular Products, Inc
.Jeremy E. Scheel, Research Engineer, Lambda Technologies
Douglas J. Hornbach, Vice President, Director of Laboratory Operations, Lambda Technologies
N. Jayaraman PhD, Director of Materials Research, Lambda Technologies
Proceedings of NACE International Corrosion 2011 Conference & Expo, Houston, TX. Paper 11115.
Sulfide stress cracking (SSC) along with hydrogen embrittlement (HE) prevents the use of less expensive high strength carbon steel alloys in the recovery of fossil fuels in H2S containing ‘sour’ service environments that are commonly seen in deep well fossil fuel recovery efforts. High magnitude tensile stresses are generated by connection interferences created during power make-up of down hole tubular components. When subject to service loads the stresses are increased further providing the high tensile stresses necessary for SSC initiation. Because these alloys processed into high strength grades are not suited for fully saturated sour service environments, the current solution is to use or develop much more expensive alloys with increased corrosion-cracking resistance or limit their use to significantly weaker sour environments or higher operating temperatures. (See the full paper)
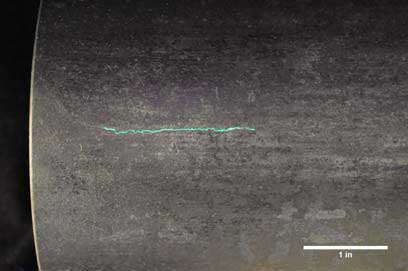
Penetrant dye shows cracking in the untreated specimen. LPB treated coupling did not fail, even at elevated pressures.
(No. 279) “Engineered Residual Stress to Mitigate Stress Corrosion Cracking of Stainless Steel Weldments”
Jeremy E. Scheel, Research Engineer, Lambda Technologies
Douglas J. Hornbach, Vice President, Director of Laboratory Operations, Lambda Technologies
N. Jayaraman PhD, Director of Materials Research, Lambda Technologies
Proceedings of NACE International Corrosion 2011 Conference & Expo, Houston, TX. Paper 11283.
Stress corrosion cracking (SCC) is the result of the combined influence of tensile stress and a corrosive environment on a susceptible material. Austenitic stainless steels including types 304L and 316L are susceptible alloys commonly used in nuclear weldments. An engineered residual stress field can be introduced into the surface of components that can reliably produce thermo-mechanically stable, deep compressive residual stresses to mitigate SCC. The stability of the residual stresses is dependent on the amount of cold working produced during surface enhancement processing. Three different symmetrical geometries of weld mockups were processed using low plasticity burnishing (LPB) to produce the desired compressive residual stress field on half of each specimen. SCC testing in boiling MgCl2 was performed to compare the LPB treated and un-treated 304L and 316L stainless steel weldments. X-ray diffraction residual stress analyses were used to document the respective residual stress fields and percent cold working of each condition. Testing was performed to quantify the thermo-mechanical stability of the residual stresses. The un-treated weldments suffered severe SCC damage due to the residual tension from the welding operation. The results show conclusively that LPB completely mitigated SCC in the tested weldments and provided thermo-mechanically stable, deep residual compression. (See the full paper)
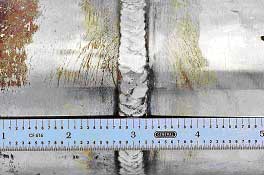
Cracking shown with dye penetrant on the unprocessed side of the pipe.
(No. 278) “Preventing Stress Corrosion Cracking of Nuclear Weldments Via Low Plasticity Burnishing”
“Jeremy E. Scheel, Research Engineer, Lambda Technologies
Douglas J. Hornbach, Vice President, Director of Laboratory Operations, Lambda Technologies
N. Jayaraman PhD, Director of Materials Research, Lambda Technologies
Stress corrosion cracking (SCC) has been observed for decades in austenitic alloy weldments such as types 304 and 316 stainless steel as well as in Ni based alloy weldments including Alloy 600 and 690. SCC continues to be a primary maintenance concern for many components in both pressurized water reactors (PWR) and boiling water reactors (BWR). SCC is understood to be the result of a combination of susceptible material, exposure to a corrosive environment, and tensile stress above a threshold. Tensile residual stresses developed by prior machining and welding can accelerate SCC. A surface treatment is needed that can reliably produce deep compressive residual stresses in austenitic and Ni based alloy weldments in order to prevent SCC. Post-weld surface enhancement processing via low plasticity burnishing (LPB®) can be used to introduce deep compression into tensile fusion welds thereby mitigating SCC. LPB® has been developed as a rapid and inexpensive surface enhancement method adaptable to existing CNC machine tools or robots. Deep compressive residual stresses produced by LPB® are designed to reduce the surface, and near surface stress state to well below the SCC threshold. Residual stress results are shown for 304L stainless steel, Alloy 22 and Alloy 718. SCC test results comparing LPB® treated and un-treated 304L and 316L stainless steel weldments are presented. Results show that the deep compression produced by LPB® eliminates SCC in austenitic weldments. (See the full paper)
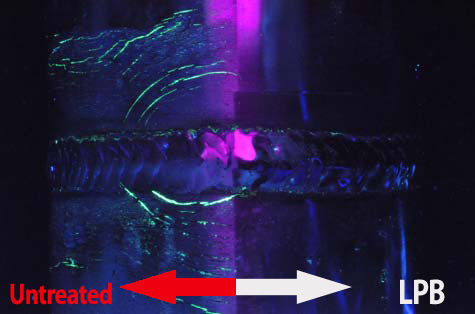
Black light fluorescent dye defines severe SCC cracking on un-treated side of a 316L SS pipe weld specimen.
Cracking on the un-processed sides of the welds and base material was characteristic of SCC with cracks running near perpendicular to the directions of maximum residual tensile stresses. The majority of cracking was observed in the region 0.5 in. to 1.25 in. (13 to 38 mm) from the fusion line of the weld.
(No. 277) “The Effect of Surface Enhancement on the Corrosion Properties, Fatigue Strength, and Degradation of Aircraft Aluminum.”
Jeremy E. Scheel, Research Engineer, Lambda Technologies
Douglas J. Hornbach, Vice President, Director of Laboratory Operations, Lambda Technologies
Paul S. Prevéy, President, Director of Engineering, Lambda Technologies
Proceedings of NACE International Corrosion 2010 Conference & Expo, Houston, TX. Paper 10087.
Corrosion, Stress Corrosion Cracking (SCC) and corrosion fatigue failures of high strength aircraft aluminums are costly and potentially catastrophic material problems affecting the aircraft fleet today. As the service lives of aircraft are extended, the increasing inspection and repair of corrosion in aging aircraft adversely affects fleet readiness, the cost of operation, and personnel safety. Shot peening (SP) is a widely used surface enhancement and repair method that produces a shallow layer of compressive residual stress on the surface of components to improve fatigue life and corrosion resistance. The repeated random impact of shot subjects the treated surface to a high level of plastic deformation, or cold working. The high level of cold working reduces the thermal and mechanical stability of the beneficial compressive layer and creates a more chemically active surface that is prone to corrosive attack. Low Plasticity Burnishing (LPB®) surface enhancement processing imparts a deep layer of stable compression with minimal cold working and has been shown to greatly improve fatigue and corrosion properties while avoiding the adverse effects of high cold working. The corrosion fatigue and pitting corrosion performance of 7475-T7351 aluminum alloy is investigated for both SP and LPB® treated test specimens. In all cases, LPB® provided greater resistance to pitting and SCC damage. Corrosion fatigue life and damage tolerance were improved compared to the SP specimens. The depth of the shot peening compressive layer extends only a few thousandths of an inch into the surface. LPB® imparts a much deeper layer of thermomechanically stable residual compression. Corrosion pits, cracks, or other damage that exceed the depth of compression serve as the nucleation point(s) for corrosion induced fatigue cracking. Pit depths asymptotically approached a maximum depth dependent upon the surface treatment. The depth of compression from LPB® greatly exceeds the maximum corrosion pit depth, therefore preventing corrosion related fatigue failure and ensuring safe-life operation. (See the full paper)
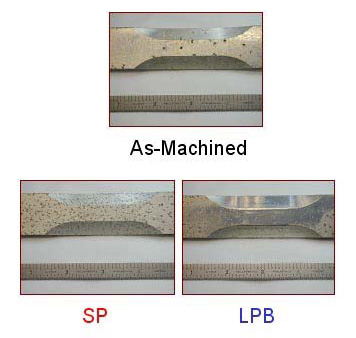
AA7475-T7351 fatigue specimens after exposure. SP specimens exhibited greater corrosion damage than LPB and as machined specimens.
By introducing compression below the maximum pit depth the damage tolerance will be dramatically improved. Furthermore, if corrosion damage reaches a maximum, as these data indicate, a deep layer of residual compression well below the damage depth can, in principle, protect a structural component for the life of the aircraft. This would eliminate periodic grinding of corrosion and re-treatment of critical aircraft components.
(No. 276)”Safe Life Conversion of Aircraft Aluminum Structures via Low Plasticity Burnishing for Mitigation of Corrosion Related Failures.
Jeremy E. Scheel, Research Engineer, Lambda Technologies
Douglas J. Hornbach, Vice President, Director of Laboratory Operations, Lambda Technologies
Paul S. Prevéy, President, Director of Research, Lambda Technologies
Presented at Department of Defense Corrosion Conference 2009, Washington DC, August 10-14, 2009
Corrosion induced cracking, pitting, and the resultant failure of high strength aircraft
aluminums are some of the most costly, and potentially catastrophic, material problems affecting the modern and aging aircraft fleet. Increased inspections, maintenance, and repair, due to corrosion of aging aircraft, adversely affect fleet readiness, personnel safety, and greatly increase cost of operation. Shot peening (SP), has been used to produce a compressive layer of residual stress on the surface of components to improve fatigue life and stress corrosion cracking (SCC) resistance. The depth of the shot peening compressive layer extends only a few thousandths of an inch into the surface. Corrosion pits, cracks, or other damage that exceed the depth of compression serve as the nucleation point(s) for corrosion induced fatigue cracking. (See the full paper)
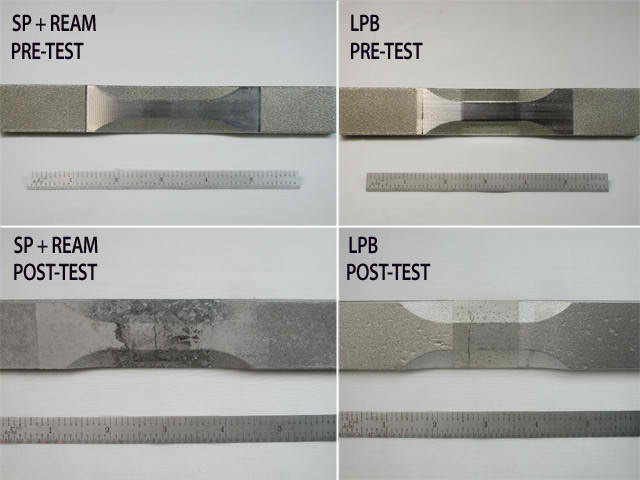
Low magnification photos of specimens before and after exposure. SP specimens exhibited greater damage than LPB® specimens. Photographs of the surfaces of AA7076-T6 specimens before and after testing are shown above. SP specimens tended to have a greater overall number of pits compared to LPB® processed specimens. SP specimens also had deeper pits compared to the LPB® specimens, which exhibited shallow surface damage with fewer deep pits.
(No. 275) “Optimization of Spring Performance Through Understanding and Application of Residual Stress.
Douglas J. Hornbach, Vice President, Director of Laboratory Operations, Lambda Technologies
Ed Lanke, President, Wisconsin Coil Spring Inc.
David Breuer, Technical Services Manager, Metal Improvement Company
Spring Industry Technical Symposium 1999
The intent of this paper is not to present a new technology available to spring makers and spring users. The intent of this paper is to utilize existing spring manufacturing and analysis techniques to further the understanding of how a spring’s fatigue performance can be enhanced and/or changed by modifying residual stress levels. The three technologies used in this paper are not new technologies. Spring coiling, shot peening, and x-ray diffraction have all been around for decades. When the three are used interactively, along with scanning electron microscopy (SEM) and fatigue testing, the end result is a closed loop of theory supported by actual physical evidence. This is shown in the form of residual stress graph profiles and actual fatigue data proving or disproving proposed theory. Critical to this study is the understanding and modifying of residual stresses to determine fatigue performance of coiled springs. It was also hoped that new information would be unveiled through extensive use of X-ray diffraction throughout the manufacturing of the springs. The following spring manufacturing techniques are examined and explained with the tools explained in the previous paragraph. (See the full paper)
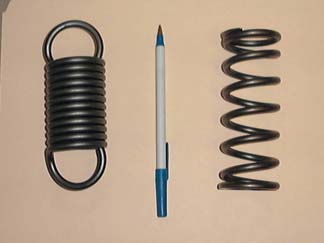
Compression and Expansion Springs
(No. 274) “The Influence of Surface Enhancement by Low Plasticity Burnishing onthe Corrosion Fatigue Performance of 7475-T7351 and 2024-T351.
Paul S. Prevey , Lambda Technologies
Douglas J. Hornbach, Lambda Technologies
M. Piche, Bombardier Aerospace
D. Rivest, Bombardier
Aerospace Conference Proceedings: ICSP-10 Tokyo, Japan 2008
Corrosion fatigue and stress corrosion cracking are primary failure mechanisms that reduce the structural integrity of aircraft. Conventional corrosion mitigation in aircraft involves coatings, alloy substitution, or modifications in design to reduce stresses. All are expensive solutions. This paper describes the use of low plasticity burnishing (LPB®)to enhance the corrosion fatigue strength in 7475-T7351 and 2024-T351, without alteration of environment, material or component design.
The fatigue performance of LPB® processing and shot peening of both 7475-T7351 and 2024-T351 were compared. Various processing and exposure conditions, typical of aircraft structures, were investigated including shot peening, anodization, thermal exposure and salt spray exposure. X-ray diffraction residual stress measurements revealed that LPB® produced twice the depth of compression as shot peening. LPB® produced a 10X improvement in life over shot peening for 7475-T7351 and a 50% improvement in life over shot peening in2024-T351. (See the full paper)
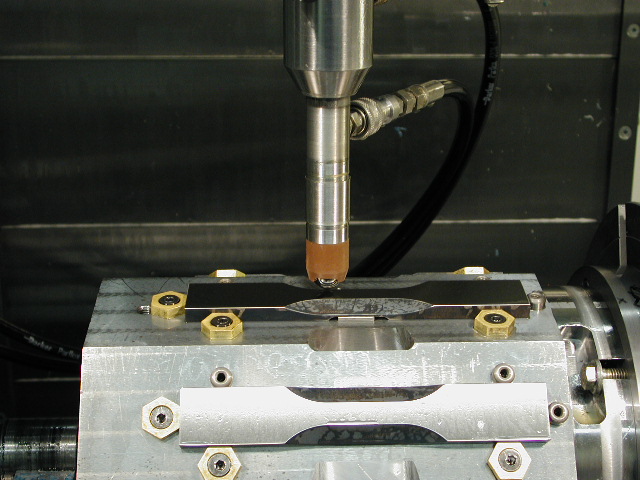
LPB processing a set of eight fatigue specimens in a 4-axis CNC mill.It has been demonstrated that LPB improves high cycle fatigue (HCF)performance and damage tolerance and reduces the susceptibility for SCC of turbine engine components, airframe structures, nuclear weldments and biomedical implants.
(No. 273) “Evaluation of Welding Residual Stress Levels Through Shot Peening and Heat Treating.
Mark S. Molzen, Metal Improvement Company
Douglas J. Hornbach, Lambda Technologies
Presented at International Off-Highway & Powerplant Congress & Exposition, September 2000, Milwaukee, WI, USA
Session: Surface Metallurgy. Copyright SAE 2000
The welding process induces residual tensile stress that is detrimental to fatigue life. Tensile stresses act to stretch or pull apart the surface of the material. With enough load cycles at a high enough tensile stress, a metal surface will initiate a crack. Significant improvements in fatigue life can be obtained by modifying the residual stress levels in the material. Two methods of performing this are through heat treating and shot peening. Both will be thoroughly analyzed in this paper through the use of x-ray diffraction. X-ray diffraction is the most accurate and best-developed method to characterize the residual stress in polycrystalline material. (See the full paper)
(No. 272) “Mitigation of Stress Corrosion Cracking in Nuclear Weldments using Low Plasticity Burnishing”
Jeremy E. Scheel, Research Engineer, Lambda Technologies
Douglas J. Hornbach, Vice President, Director of Laboratory Operations, Lambda Technologies
Paul S. Prevéy, President, Director of Research, Lambda Technologies
Proceedings of the 16th International Conference of Nuclear Engineering (ICONE), Orlando, FL, May 11-15, 2008
Stress corrosion cracking (SCC) has been observed for decades in austenitic alloy weldments such as type 304 stainless steel as well as in Ni based alloy weldments including Alloy 600 and 690. SCC continues to be a primary maintenance concern for many components in both pressurized water reactors (PWR) and boiling water reactors (BWR). SCC is understood to be the result of a combination of susceptible material, exposure to a corrosive environment, and tensile stress above a threshold. Tensile residual stresses developed by prior machining and welding can accelerate SCC. A surface treatment is needed that can reliably produce deep compressive residual stresses in austenitic and Ni based alloy weldments in order to prevent SCC. Post-weld surface enhancement processing via low plasticity burnishing (LPB®) can be used to introduce deep compression into tensile fusion welds thereby mitigating SCC. LPB® has been developed as a rapid and inexpensive surface enhancement method adaptable to existing CNC machine tools or robots. Deep compressive residual stresses produced by LPB® are designed to reduce the surface, and near surface stress state to well below the SCC threshold. Residual stress results are shown for 304 stainless steel, Alloy 22 and Alloy 718. SCC test results comparing LPB® treated and un-treated 304 stainless steel weldments are presented. Results show that the deep compression produced by LPB® eliminates SCC in austenitic weldments. (See the full paper)
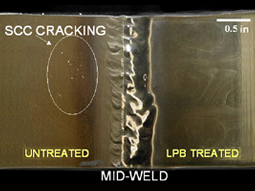
Surface Enhancement Technical Papers 304SS welded specimen showing no SCC on LPB® treated side. An investigation was undertaken to characterize the influence of the LPB® treatment on SCC in 304SS weldments. SCC testing of LPB® treated 304SS weldments showed a complete mitigation of SCC. LPB® is a cost efficient, easily implemented technology, which is capable of producing a deep layer of stable compression in nuclear weldments.
304SS welded specimen showing no SCC on LPB treated side.An investigation was undertaken to characterize the influence of theLPB treatment on SCC in 304SS weldments. SCC testing of LPB treated304SS weldments showed a complete mitigation of SCC. LPB is a cost efficient, easily implemented technology, which is capable of producing a deep layer of stable compression in nuclear weldments.
(No. 271) “Mitigation of Fatigue and Pre-Cracking Damage in Aircraft Structures through Low Plasticity Burnishing (LPB®)”
.N. Jayaraman, Director of Materials Research, Lambda Technologies
Douglas J. Hornbach, Vice President, Director of Laboratory Operations, Lambda Technologies
Paul S. Prevéy, President, Director of Research, Lambda Technologies
Dr. Kristina Langer, Air Force Research Laboratory – Analytical Structural Mechanics Branch (AFRL/VASM)
2nd Lt. Jeffrey Hoover, AFRL/VASM
2nd Lt. Scott Van Hoogan, AFRL/VAS
Dr. Michael J. Shepard, AFRL/MLLMN
Proceedings of USAF Aircraft Structural Integrity Program (ASIP) 2007, Palm Springs, CA, Dec. 4-6, 2007
A test program was set up by the Air Force Research Laboratory-Analytical Structural Mechanics Branch (AFRL-VASM) to study the effect of low plasticity burnishing (LPB®) to mitigate fatigue debit due to pre-cracking damage in two feature specimens made of AA2024-T851 and designed to simulate features of aircraft structures. The LPB® solution consisted of (a) designing the compressive residual stress field using Lambda’s Fatigue Design Diagram (FDD) method, (b) introducing the compression via LPB® tools and fixtures into the parts, (c) verifying the achieved residual stress distribution by measurements, and (d) validating the predictions through fatigue tests conducted by AFRL-VASM group. The goal of this paper is to demonstrate the mitigation of pre-cracking and fatigue damage in AA2024-T851 parts simulating two different features of air frame structure through LPB® treatment. (See the full paper)
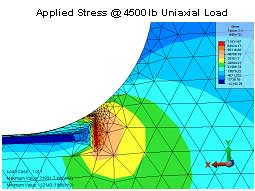
FEA showing the high stress areasStress contours from Finite Element Analysis (FEA) showing the high stress areas in the AA2024-T851 component.
(No. 270) “Reducing Corrosion Fatigue and SCC Failures in 300M Steel Landing Gear Using Low Plasticity Burnishing”.
Douglas J. Hornbach, Vice President, Director of Laboratory Operations, Lambda Technologies
Paul S. Prevéy, President, Director of Research, Lambda Technologies
Proceedings of 2007 SAE AeroTech Congress & Exhibition, Los Angeles, CA, September 17-20, 2007
300M steel is often used in landing gear because of its high strength and high fracture toughness. Conversely, 300M steel is highly susceptible to corrosion fatigue and stress corrosion cracking (SCC), which can lead to catastrophic consequences for aircraft landing gear. Shot peening and plating of the landing gear are used to suppress corrosion fatigue and SCC with limited success. A method that will produce deeper compression in critical regions of landing gear will provide a dramatic improvement in foreign object damage (FOD) tolerance, corrosion fatigue strength and SCC susceptibility. This paper discusses the use of low plasticity burnishing (LPB®) to provide a deep layer of residual compression to improve damage tolerance and mitigate SCC of 300M steel. The fatigue performance of LPB® processed 300M steel test samples were compared to those in a shot peened or low-stress-ground (LSG) condition. LPB® treatment dramatically improved the high cycle fatigue (HCF) and corrosion fatigue performance with and without a simulated defect. LPB® reduced the surface stress well below the SCC threshold for 300M, even under high tensile applied loads, effectively suppressing the SCC failure mechanism. SCC testing of LPB® treated landing gear sections at tensile stresses ranging from 1030 to 2270 MPa (150 to 180 ksi) was terminated after 1500 hrs without failure, compared to failure in as little as 13 hours without LPB® treatment. (See the full paper)
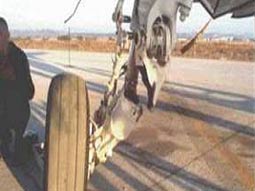
Low plasticity burnishing (LPB) has been formulated, qualified and demonstrated to provide deep, controlled high compression with low cold working that mitigates SCC and dramatically improves the fatigue life and damage tolerance of aircraft landing gear mechanisms composed of ultrahigh strength steels such as 4340 and 300M.
(No. 269)”Mitigation of Fretting Fatigue Damage in Blade and Disk Pressure Faces with Low Plasticity Burnishing”.
Paul S. Prevéy, President, Director of Research, Lambda Technologies
N. Jayaraman, Director of Materials Research, Lambda Technologies
Ravi A. Ravindranath, Propulsion & Power, Naval Air Systems Command (NAVAIR)
Dr. Michael J. Shepard, Materials Research Engineer, AFRL/MLLMN
Proceedings of ASME Turbo Expo 2007, Montreal, Canada, May 14-17, 2007
Journal of Engineering for Gas Turbines and Power. SEPTEMBER 2008, Vol. 130
Low Plasticity Burnishing (LPB®) is now established as a surface enhancement technology capable of introducing through-thickness compressive residual stresses in the edges of gas turbine engine blades and vanes to mitigate foreign object damage (FOD). The “Fatigue Design Diagram” (FDD) method has been described and demonstrated to determine the depth and magnitude of compression required to achieve the optimum high cycle fatigue (HCF) strength, and to mitigate a given depth of damage characterized by the fatigue stress concentration factor, kf. LPB® surface treatment technology and the FDD method have been combined to successfully mitigate a wide variety of surface damage ranging from FOD to corrosion pits in titanium and steel gas turbine engine compressor and fan components. LPB® mitigation of fretting induced damage in Ti-6AL-4V in laboratory samples has now been extended to fan and compressor components.(See the full paper)
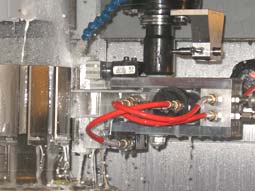
LPB processing of compressor disk
LPB processing of a Ti-6Al-4V compressor disk dovetail post contact region using a specially designed LPB tool.
(No. 268)”The Use of Engineered Compressive Residual Stresses to Mitigate Stress Corrosion Cracking and Fatigue Failure in 300M Landing Gear Steel”.
Paul S. Prevéy, President, Director of Research, Lambda Technologies
N. Jayaraman, Director of Materials Research, Lambda Technologies
Dr. Michael J. Shepard, Materials Research Engineer, AFRL/MLLMN
Robert Ware, Structural Failure Analysis, AFRL/MLSA
Jack E. Coate, Mechanical Engineer, AFRL/MLSC
Neal Ontko, Team Lead, Materials & Test, AFRL/MLSC
Proceedings of 10th Joint FAA/DOD/NASA Aging Aircraft Conference, Palm Springs, CA, April 16-19, 2007
300M steel combines ultra high tensile strength with good fracture toughness, making it an excellent candidate for aircraft landing gear applications. However, like most high strength steels, 300M is vulnerable to stress corrosion cracking (SCC) and FOD initiated high cycle fatigue (HCF) failure. The sensitivity of 300M to salt water corrosion fatigue and static SCC adversely impacts Navy and Marine aircraft readiness and maintenance costs. SCC and FOD initiated failures are well documented in both military and civilian high strength steel landing gear and structural components. Shot peening (SP) is commonly used to improve the fatigue performance of high strength steels, but provides only partial corrosion fatigue benefit, only very shallow damage tolerance, and no significant SCC improvement. Surface treatment with low plasticity burnishing (LPB®) has been applied to create a compressive residual stress distribution with a depth and magnitude designed to mitigate both SCC and FOD in 300M landing gear steel. The damage tolerance, corrosion fatigue and static salt-water SCC performance of LPB® treated 300M steel are compared with the SP currently used for landing gear and a low stress ground (LSG) baseline condition. LPB® produced compression to a depth of 1.27 mm (0.050 in.), compared to 0.127 mm (0.005 in.) for the current SP treatment. The depth of LPB® compression dramatically improved both the damage tolerance and corrosion fatigue strength. The 107 cycle fatigue strength for the LSG baseline condition decreased dramatically with salt-water exposure, from nominally 760 MPa (110 ksi) to 207 MPa (30 ksi). Exposure to salt water appears to eliminate the typical endurance limit behavior of the steel, causing the fatigue strength to continuously diminish with time and cyclic loading. The HCF and corrosion fatigue performance with a 0.5 mm (0.020 in.) deep notch was even worse. In contrast, LPB® treated specimens with 0.5 mm (0.020 in.) deep surface damage showed a definite endurance limit of 1035 MPa (150 ksi) under corrosion fatigue conditions. Statically loaded salt-water SCC was eliminated entirely by LPB® treatment. Shot peened 300M failed in just a few hours under static loading in salt water. LPB® treated samples exhibited only general corrosion and survived 1500 hrs. at the same stress without failing. (See the full paper)

300M steel in military landing gear
300M steel combines ultra high tensile strength with good fracture toughness, making it an excellent candidate for aircraft landing gear applications. However, like most high strength steels, 300M is vulnerable to stress corrosion cracking (SCC) and FOD initiated high cycle fatigue (HCF) failure. Low plasticity burnishing (LPB) creates a compressive residual stress distribution with a depth and magnitude designed to mitigate both SCC and FOD in 300M landing gear steel.
(No. 267) “Controlled Plasticity Burnishing to Improve the Performance of Friction Stir Processed Ni-Al Bronze”.
Paul S. Prevéy, President, Director of Research, Lambda Technologies
Douglas J. Hornbach, Vice President, Director of Laboratory Operations, Lambda Technologies
N. Jayaraman, Director of Materials Research, Lambda Technologies
Proceedings of Thermec 2006, Vancouver, Canada, July 4-6, 2006
Friction stir welding (FSW) allows the joining of aluminum alloys in ways previously unattainable offering new manufacturing technology. Friction stir processing (FSP) of cast alloys such as Ni-Al bronze eliminates casting voids and improves the properties to that of wrought material. However, the local heating produced by both FSW and FSP can leave a fusion zone with reduced mechanical properties and a heat-affected zone with tensile residual stresses that can be deleterious to fatigue performance. Controlled plasticity burnishing (CPB) is an established surface treatment technology that has been investigated and described extensively for the improvement of damage tolerance, corrosion fatigue, and stress corrosion cracking performance in a variety of alloys. Mechanical CPB processing in conventional CNC machine tools or with robotic tool positioning is readily adapted to industrial FSW and FSP fabrication of components, either simultaneously or as a post process. The purpose of this investigation was to document the effect of the deep compressive layer generated by controlled plasticity burnishing (CPB) on the high cycle fatigue (HCF) performance and FOD tolerance of friction stir processed NAB in a simulated marine salt water environment. (See the full paper)
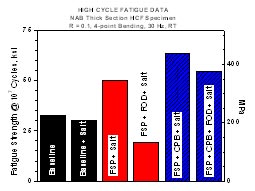
HCF Data for Ni-A1 Bronze
High Cycle Fatigue (HCF) data illustrates how CPB increased the 107 cycle fatigue strength by almost 3X, to 55 ksi, with a life increase of 100X, at, in Ni-A1 bronze specimens with a defect.
(No. 266) “Improved High Cycle Fatigue Damage Tolerance of Turbine Engine Compressor Components by Low Plasticity Burnishing (LPB®)”.
Paul S. Prevéy, President, Director of Research, Lambda Technologies
N. Jayaraman, Director of Materials Research, Lambda Technologies
Ravi A. Ravindranath, Propulsion & Power, Naval Air Systems Command (NAVAIR)
Dr. Michael J. Shepard, Materials Research Engineer, AFRL/MLLMN
Proceedings of Turbo Expo 2006, Barcelona, Spain, May 8-11, 2006.
Journal of Engineering for Gas Turbines and Power, ASME, Ed. Dilip Ballal, Vol. 130, January 2008, pp. 012102-1-012102-5.
Significant progress has been made in the application of low plasticity burnishing (LPB®) technology to military engine components, leading to orders of magnitude improvement in damage tolerance. Improved damage tolerance can facilitate inspection, reduce inspection frequency, and improve engine operating margins, all leading to improved military readiness at significantly reduced total costs. Basic understanding of the effects of the different LPB® process parameters has evolved, and finite element based compressive residual stress distribution design methodologies have been developed. By incorporating accurate measurement of residual stresses to verify and validate processing, this combined technology leads to a total solutions approach to solve damage problems in engine components. An example of the total solution approach to develop LPB® processing of a 1st stage Ti-6Al-4V compressor vane to improve the foreign object damage (FOD) tolerance from 0.002 in.to 0.025 in. is presented. The LPB® process, tooling, and control systems are described, including recent developments in real-time process monitoring for quality control. Performed on CNC machine tools, LPB® processing is easily adapted to overhaul and manufacturing shop operations with quality assurance procedures meeting military and industry standards, facilitating transition to military depots and manufacturing facilities. (See the full paper)
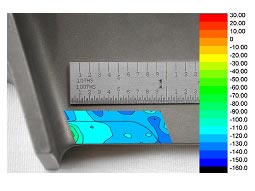
LPB-induced compression contour plot
The compressive residual stress distribution produced by LPB on the trailing edge of the Ti-6Al-4V compressor vane is shown in the form of a stress contour map superimposed upon the outline of the LPB zone.
(No. 265)”Case Studies of Mitigation of FOD, Fretting Fatigue, Corrosion Fatigue and SCC Damage by Low Plasticity Burnishing in Aircraft Structural Alloys”.
N. Jayaraman, Director of Materials Research, Lambda Research, Inc.
Paul S. Prevéy, President, Director of Research, Lambda Research, Inc.
Proceedings of USAF Aircraft Structural Integrity Program (ASIP), Memphis, TN, Nov. 29-Dec. 1, 2005
Surface enhancement technologies such as shot peening (SP), laser shock peening (LSP) and low plasticity burnishing (LPB®) can provide mitigation of foreign object damage (FOD), fretting fatigue, corrosion fatigue, and stress corrosion cracking (SCC) damage. However, to be effective, the compressive residual stresses must be retained in service for successful integration into aircraft structural design, and the process must be affordable and compatible with the manufacturing environment. LPB® provides high magnitude deep thermally and mechanically stable compression, and is performed on CNC machine tools. LPB® provides a means to extend the lives of both new and legacy aircraft structural components. Improving fatigue performance by introducing deep, stable layers of compressive residual stress avoids the generally prohibitive cost of modifying either material or design. (See the full paper)

Residual stress profiles
Residual stress profiles of shot peened and LPB treated 300MHSLA steel specimens before and after 48 hours of thermal exposure to 400F.
(No. 264) “An Overview of the use of Engineered Compressive Residual Stresses to Mitigate SCC and Corrosion Fatigue”.
N. Jayaraman, Director of Materials Research, Lambda Research, Inc.
Paul S. Prevéy, President, Director of Research, Lambda Research, Inc.
Proceedings of 2005 Tri-Service Corrosion Conference, Orlando, FL, Nov. 14-18, 2005
Mechanical suppression of corrosion fatigue and stress corrosion cracking (SCC) through low plasticity burnishing (LPB®) has been demonstrated in several systems. LPB® can be used to impart controlled compressive residual stresses of desired depth, magnitude and location in structural components. For example, in 300M aircraft landing gear steel, LPB® produced over 1.2 mm of compression and in turn completely mitigated corrosion fatigue and SCC, even in the presence of simulated foreign object damage(FOD). In precipitation hardenable stainless steels used for turbine engine compressor blade applications, full mitigation of corrosion fatigue damage and FOD has been achieved. In friction stir processed (FSP) aluminum alloys, LPB® mitigated the corrosion fatigue damage by completely suppressing the tensile residual stresses associated with the FSP. A comprehensive design procedure has been developed to determine the optimum location and magnitude of compression. Effects of compensatory tension and part distortion are analyzed with the use of several design tools like Fatigue Design Diagram and finite element analysis (FEA). Actual measurements of residual stresses and corrosion fatigue tests are used to validate the initial design. LPB® has been applied to successfully mitigate FOD and/or SCC in 300M landing gear steels, corrosion fatigue in turbine engine compressor blade 17-4PH and Custom450 stainless steels, and aircraft structural aluminum alloys AA7075-T6 and AA2219-T8751. In this paper, selected examples demonstrating the mitigation of active corrosion fatigue, restoration of fatigue performance after severe pitting due to prior corrosion exposure, and complete prevention of SCC by LPB® treatment are presented. (See the full paper)
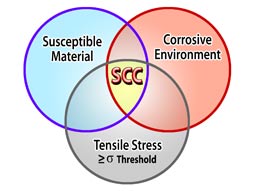
SCC Susceptibility Diagram
The Stress Corrosion Cracking (SCC) Susceptibility Diagram illustrates the need for the combination of a susceptible material (300M steel), a corrosive environment (salt water), and threshold tensile stress to cause SCC in aircraft landing gear.
(No. 263) “Application of Low Plasticity Burnishing (LPB®) to Improve the Fatigue Performance of Ti-6Al-4V Femoral Hip Stems”.
Douglas J. Hornbach, Vice President, Director of Laboratory Operations, Lambda Technologies
Paul S. Prevéy, President, Director of Research, Lambda Technologies
E. Loftus, Sr. Product Development Engineer, Exactech, Inc.
Symposium on Fatigue & Fracture of Medical Metallic Materials & Devices, Dallas, TX, Nov. 10, 2005
Low plasticity burnishing (LPB®) is a surface enhancement method that produces a deep layer of compressive residual stress with minimal cold working and an improved surface finish. Extensive fatigue testing, performed on numerous metal alloys in simulated environmental conditions, demonstrates that LPB® significantly improves fatigue strength of highly stressed components. LPB® is a flexible process, capable of being implemented on a wide variety of CNC machine tools. A product-specific LPB® process was developed and applied to the modular neck taper junction of a Ti-6Al-4V total hip prosthesis (THP). LPB® produced a compressive residual stress field with an improved surface finish, which enhanced component fatigue strength and resistance to fretting damage. X-ray diffraction (XRD) residual stress measurements, made before and after LPB® application, are shown. High cycle fatigue (HCF) results obtained on LPB®-processed hip stems are shown along with baseline data for unprocessed hip stems. HCF tests demonstrate complete elimination of fretting fatigue failures in the LPB® processed area of the taper junction and a substantial increase in overall THP fatigue strength. (See the full paper)
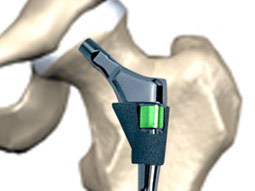
LPB-protected hip prosthesis
Total hip prosthesis neck segment (highlighted in green) protected withLow Plasticity Burnishing (LPB) by improving HCF performance and eliminating the occurrence of fretting-induced fracture.
(No. 262) “Improved Damage Tolerance of Ti-6Al-4V Aero Engine Blades and Vanes using Residual Compression by Design”.
N.Jayaraman, Director of Materials Research, Lambda Research, Inc. Paul S. Prevéy, President, Director of Research, Lambda Research, Inc.
Ravi A. Ravindranath, Propulsion & Power, Naval Air Systems Command (NAVAIR)
Proceedings of NATO RSV, Granada, Spain, Oct. 3-7, 2005
The deep stable layer of compressive residual stress produced by low plasticity burnishing (LPB®) has been demonstrated in laboratory testing to improve damage tolerance in engine alloys IN718, Ti-6Al-4V, Ti-6-2-4-6, and 17-4PH. This paper describes the fatigue and FOD tolerance benefits afforded by LPB® treatment of a Ti-6Al-4V first stage fan blade and vane. FOD sensitive blades and vanes removed from fielded engines were LPB® processed to protect the leading edge of the blade and the trailing edge of the vane. Both components were fatigue tested in cantilever bending mode at R>0 using specially designed test fixtures. FOD was simulated with machined notches for the blade and electrical discharge machined (EDM) notches for the vane. Residual stress and cold work distributions were measured using x-ray diffraction mapping techniques. (See the full paper)
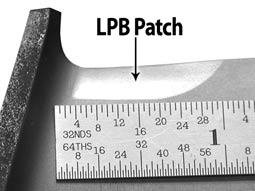
Processed vane showing LPB zone
F402 Engine First Stage Low Pressure Compressor (LPC1) Vane with the LPB zone imparted to improve service life.
(No. 261) “The Effect of Shot Peening Coverage on Residual Stress, Cold Work, and Fatigue in a Nickel-base Superalloy”.
J.T. Cammett, U.S. Naval Aviation Depot, Cherry Point, NC, USA
Paul S. Prevéy, President, Director of Research, Lambda Research, Inc.
N. Jayaraman, Director of Materials Research, Lambda Research, Inc.
Proceedings of International Conference on Shot Peening – ICSP 9, Paris, Marne la Vallee, France, Sept. 6-9, 2005
The goal of this work was to determine effects of shot peening (SP) coverage on the compressive residual stress magnitude, depth, and relaxation of residual stresses due to thermal exposure, as well as fatigue strength of IN718, a nickel-base superalloy. The residual stress-depth profiles (both depth of compression and magnitude) for coupons shot peened to different coverage levels of 82% (0.2T where T = time to achieve full area coverage) to 400% (4T) show a slight trend of increased depth of compression with increase in coverage. Though having similar residual stress distributions, the coupons exhibited markedly different cold work distributions. While 82% (0.2T) coverage resulted in less than five percent cold work, increasing coverage to 400% (4T) resulted in cold work as high as thirty-five percent. The heavily cold worked surfaces of the higher coverage coupons exhibited significant relaxation of surface residual stresses, accompanied by corresponding reduction of cold work upon thermal exposure at 525°C for 10 hours. In contrast, the low cold work associated with lower SP coverage resulted in little relaxation of residual stresses under the same conditions. These observations were consistent with findings in other alloy systems. High cycle fatigue (HCF) performance at 525°C showed little dependence on peening coverage. Even with deeper compression achieved through low plasticity burnishing (LPB®), the 525C fatigue performance of IN718 was only marginally improved. There may be other controlling elevated temperature fatigue mechanisms, such as oxidation, operating here that do not depend on residual stresses. HCF behavior at room temperature for the LPB® treatment was significantly better than for SP treatment. (See the full paper)
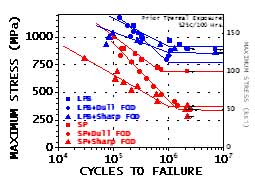
HCF results for surface treated IN718
Effect of simulated FOD on HCF results for surface treated IN718. The SP specimens showed a drop in fatigue strength at 107 cycles of 50% from690 MPa (100 ksi) to about 345 MPa (50 ksi). In contrast, the LPB treated specimens showed less than 15% drop in fatigue strength from about 900 Mpa (130 ksi) to about 800MPa (115 ksi).
(No. 260) “Overview of Low Plasticity Burnishing for Mitigation of Fatigue Damage Mechanisms”.
Paul S. Prevéy, President, Director of Research, Lambda Research, Inc.
N. Jayaraman, Director of Materials Research, Lambda Research, Inc.
J.T. Cammett, U.S. Naval Aviation Depot, Cherry Point, NC, USA
Proceedings of International Conference on Shot Peening – ICSP 9, Paris, Marne la Vallee, France, Sept. 6-9, 2005
Surface enhancement technologies such as shot peening (SP), laser shock peening (LSP), and low plasticity burnishing (LPB®) can provide substantial fatigue life improvement. However, to be effective, the compressive residual stresses that increase fatigue strength must be retained in service. LPB® provides thermally stable compression and can be performed in conventional machine shop environments on CNC machine tools. LPB® enables the extension of component service lives fatigue limited by various damage mechanisms including foreign object damage (FOD), corrosion fatigue, pitting, and fretting. The thermal and mechanical stability of the compressive layer are briefly reviewed. The LPB® process, tooling, and control system are briefly described. Four representative applications are presented: thermal stability in IN718, improved damage tolerance in Ti-6-4 fan blades, mitigation of fretting fatigue damage in Ti-6-4, and improved corrosion fatigue in 17-4PH stainless steel. (See the full paper)
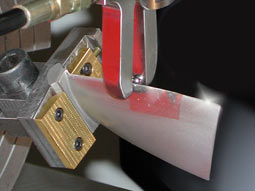
LPB treatment of compressor blade
LPB processing of the leading edge of a 17-4PH compressor blade with a caliper tool.
(No. 259)“Comparison of Mechanical Suppression by Shot Peening And Low Plasticity Burnishing to Mitigate SCC and Corrosion Fatigue Failures in 300M Landing Gear Steel”.
N. Jayaraman, Director of Materials Research, Lambda Research, Inc.
Paul S. Prevéy, President, Director of Research, Lambda Research, Inc.
Neal Ontko, Team Lead, Materials & Test, AFRL/MLSC
Dr. Michael J. Shepard, Materials Research Engineer, AFRL/MLSC
Robert Ware, Structural Failure Analysis, AFRL/MLSC
Jack E. Coate, Mechanical Engineer, AFRL/MLSC
Proceedings of International Conference on Shot Peening – ICSP 9, Paris, Marne la Vallee, France, Sept. 6-9, 2005
300M steel is widely used in aircraft landing gear because of its unique combination of strength and fracture toughness, but is vulnerable to foreign object damage (FOD), corrosion fatigue, and stress corrosion cracking (SCC) failures with potentially catastrophic consequences. The fatigue, corrosion fatigue in salt water, and SCC performance of LPB® processed 300M steel was compared with shot peened (SP) and low stress ground (LSG) conditions. LPB®, with and without simulated FOD, produced deep residual compression that dramatically improved both the HCF and corrosion fatigue strength. The fatigue strength of LSG and SP treated surfaces was drastically reduced by salt and FOD exposure with no discernible endurance limit for corrosion fatigue conditions. SCC testing of LPB® treated landing gear sections at 1030 to 2270 MPa (150 to 180 ksi) static loads was terminated after 1500 hrs without failure, compared to failure in as little as 13 hours without treatment. Mechanistically, the deep compressive surface residual stresses from LPB® treatment mitigated both the individual and synergistic effects of corrosion fatigue and FOD. LPB® also reduced the surface stress well below the SCC threshold for 300M, even under high tensile applied stresses, effectively suppressing the SCC failure mechanism. (See the full paper)
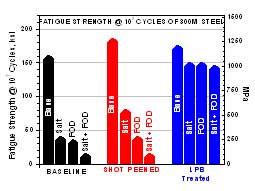
The LPB process effectively mitigates corrosion fatigue of 300M steel in salt water. The HCF and corrosion fatigue performance of LPB treated 300M with either 0.5 mm FOD or salt-water exposure is statistically similar to the unnotched baseline material. When tested in the neutral salt solution environment, the endurance limit behavior that was absent in both baseline and SP treatment is restored with the LPB treatment.
(No. 258) “Improving the Fatigue Response of Aerospace Structural Joints”.
Cindie Giummarra, Alcoa Inc., Alcoa Technical Center, Pittsburgh, Pennsylvania, USA
Harry R. Zonker, Alcoa Inc., Alcoa Technical Center, Pittsburgh, Pennsylvania, USA
Proceedings of International Committee on Aeronautical Fatigue – ICAF 2005, Hamburg, Germany, 2005
The effect of various surface treatments on the fretting fatigue and joint fatigue performance of a 7xxx series aluminum alloy was investigated with the objective to reduce the nucleation and growth of fretting cracks and enhance the fatigue life of aerospace joints. The results indicate that anodizing does not influence the fretting fatigue performance and the type of anodizing does not affect the joint fatigue life. UltraCem coating inhibited fretting crack nucleation in the fretting specimen, increasing the fatigue life. Shot peening increased the fretting fatigue life significantly due to the compressive residual stresses it imparts; however, the stresses were not deep enough to influence the fretting cracks which nucleated in the hole bore of the joint specimens. Laser peening and low plasticity burnishing induce deeper compressive residual stresses than shot peening, which appear to inhibit the growth of fretting cracks in both the fretting and joint specimens, resulting in a significant fatigue life improvement. (See the full paper)
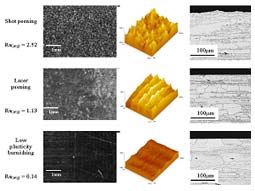
Surface treatment characteristics
Topographical characteristics of surface techniques and the effect on grain structure.
(No. 257) “Use of Residual Compression in Design to Improve Damage Tolerance in Ti-6Al-4V Aero Engine Blade Dovetails”.
Paul S. Prevéy, President, Director of Research, Lambda Research, Inc.
N. Jayaraman, Director of Materials Research, Lambda Research, Inc.
Ravi A. Ravindranath, Propulsion & Power, Naval Air Systems Command (NAVAIR)
Proceedings of the 10th National Turbine Engine High Cycle Fatigue (HCF) Conference, New Orleans, LA, March 8-11, 2005
The deep stable layer of compressive residual stress produced by low plasticity burnishing (LPB®) has been demonstrated to improve the damage tolerance in engine alloys IN718, Ti-6Al-4V, and 17-4PH. This paper describes the application of LPB® to the dovetail bedding surface of a Ti-6Al-4V fan blade to mitigate the adverse effects of fretting-induced microcracks. Blades removed from fielded engines were LPB® processed to protect the dovetail region of the blade and specially designed feature specimens were used to simulate the dovetail region of the blades. Both feature specimens and actual dovetail sections were fatigue tested in cantilever bending mode at a stress ratio, R of 0.5 using specially designed test fixtures. Coalescing microcracks were simulated with electrical discharge machined (EDM) notches. Residual stress and cold work distributions were measured using x-ray diffraction mapping techniques. LPB® produced compression in the dovetail region up to a depth of 0.065 in. The HCF performance with EDM notches up to 0.040 in. deep was tested. LPB® processed specimens with 0.020 in. deep EDM notch showed an endurance limit of 100 ksi, greater than that of the baseline undamaged surface. LPB® treated blades and feature specimens with 0.030 in. and 0.040 in. deep notches showed endurance limits of 60 and 45 ksi, respectively. LPB® was shown to fully mitigate the fretting debit, whether applied before or after the fretting damage occurred. Linear elastic fracture mechanics analysis including the residual stress fields confirms the HCF performance in the presence of high residual compression. A novel approach for determining the residual stress field design to provide a desired fatigue life and microcrack tolerance is introduced. (See the full paper)
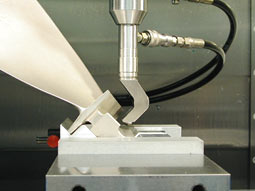
Single point tool LPB processing
Single point tool LPB processing of the dovetail of a Ti-6Al-4V compressor blade.
(No. 256) “Design Credit for Compressive Residual Stresses in Turbine Engine Components”.
Paul S. Prevéy, President, Director of Research, Lambda Research, Inc.
N. Jayaraman, Director of Materials Research, Lambda Research, Inc.
Ravi A. Ravindranath, Propulsion & Power, Naval Air Systems Command (NAVAIR)
Proceedings of the 10th National Turbine Engine High Cycle Fatigue (HCF) Conference, New Orleans, LA, March 8-11, 2005
The high cycle fatigue (HCF) performance of turbine engine components has long been improved by the introduction of a surface layer of compressive residual stress, usually by shot peening. However, credit is not generally taken for the improved fatigue performance in component design. Laser shock processing (LSP) and low plasticity burnishing (LPB®) provide impressive fatigue and damage tolerance improvement by introducing deep or through-thickness compression in fatigue critical areas, but have been applied primarily to improve existing, rather than new, designs. This paper describes a design methodology to allow credit to be taken for beneficial residual stresses in component design to achieve a required or optimal fatigue performance. The fatigue design methodology is based on an extension of the traditional Haigh Diagram to include compressive mean stresses. The Smith Watson Topper equation (or other similar equations by Walker or Jasper) is used in combination with Neuber’s rule to account for both the stress ratio, R, and stress concentration factors from notches and cracks. The extension of the Haigh Diagram into the compressive mean stress region and the effect of stress concentration factors lead to the identification of a safe range of mean and alternating stresses in which there can be no Mode I crack growth. This in turn is used to determine the minimum and optimum compressive residual stresses needed to mitigate different damage conditions in terms of kf. Case studies are presented illustrating the design approach for Ti-6Al-4V turbine engine compressor blade and vane edges to mitigate FOD and fan blade dovetail surfaces to mitigate fretting damage. (See the full paper)
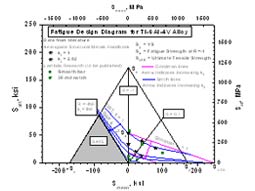
Fatigue Design Diagram (FDD)
Fatigue design diagram (FDD) for Ti-6Al-4V showing allowed alternating and mean stresses for 107 cycle life for different R-ratios and fatigue notch sensitivity factors
(No. 255) “Practical Application of Nondestructive Residual Stress Measurements by X-ray Diffraction”.
Douglas J. Hornbach, VP, Director of Laboratory Operations, Lambda Research, Inc.
Paul S. Prevéy, President, Director of Research, Lambda Research, Inc.
Mark Blodgett, AFRL/MLLP
Proceedings of ASNT Fall Conference, Las Vegas, NV, Nov. 15-16, 2004
A modified Integral Method was investigated as a means to nondestructively measure the subsurface residual stress distribution. The technique has been demonstrated to be feasible in aluminum alloys by comparison to established destructive measurement methods. In the current effort a thorough study of higher energy radiations was conducted to obtain deeper penetrating radiations on titanium and nickel base alloys. Higher energy radiation used in conjunction with the modified Integral Method would provide nondestructive subsurface residual stress measurement in components composed of these alloys. Results of the study show a nondestructive x-ray residual stress method providing measurements to depths of 0.0028 to 0.003 in. (51 to 76 mm) is not technically feasible. (See the full paper)
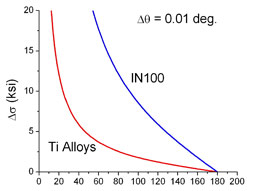
Error in measured RS vs. Bragg angle
Error in measured residual stress vs. Bragg angle for 0.01 deg. error in fitted peak position showing large errors at low angles.
(No. 254) “Mechanical Suppression of SCC and Corrosion Fatigue Failures in 300M Steel Landing Gear”.
N. Jayaraman, Director of Materials Research, Lambda Technologies
Paul S. Prevéy, President, Director of Research, Lambda Technologies
Neal Ontko, Team Lead, Materials & Test, AFRL/MLSC
Dr. Michael J. Shepard, Materials Research Engineer, AFRL/MLSC
Robert Ware, Structural Failure Analysis, AFRL/MLSC
Jack E. Coate, Mechanical Engineer, AFRL/MLSC
Proceedings of ASIP 2004, Memphis, TN, Nov. 29 – Dec. 2, 2004
300M steel is widely used in landing gear because of its ultra high strength with high fracture toughness, but is vulnerable to both corrosion fatigue and stress corrosion cracking, with potentially catastrophic consequences. Plating and shot peening surface treatments currently used to extend life are only partly effective. A surface treatment is needed that will mitigate foreign object damage (FOD), corrosion fatigue and stress corrosion cracking. This paper describes the use of low plasticity burnishing (LPB®) to improve damage tolerance and to mechanically suppress stress sensitive corrosion failure mechanisms. The fatigue and corrosion fatigue performance of LPB® processed 300M steel was compared with shot peened (SP) and low stress ground (LSG) conditions. LPB® produced residual compression to a depth of 1.27 mm (0.050 in.), and shot peening only 0.127 mm (0.005 in.), an order of magnitude less. LPB® treatment dramatically improved both the high cycle fatigue (HCF) performance and corrosion fatigue strength, with and without simulated FOD. LPB® treated specimens with 0.020 in. deep FOD exhibited a definite endurance limit of 1035 MPa (150 ksi) even under corrosion fatigue conditions. Stress corrosion cracking (SCC) testing of LPB® treated landing gear sections at 1030 to 2270 MPa (150 to 180 ksi) static loads was terminated after 1500 hrs without failure, compared to failure in as little as 13 hours without treatment. Corrosion and FOD caused early crack initiation and growth, dramatically decreasing fatigue performance. Deep surface compressive from LPB® mitigated both the individual and synergistic effects of corrosion fatigue and FOD. LPB® reduced the surface stress well below the SCC threshold for 300M, even under high tensile applied loads, effectively mechanically suppressing the SCC failure mechanism. (See the full paper.)
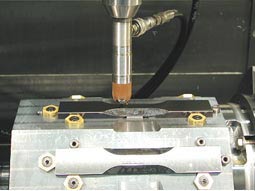
LPB processing of 300M steel
LPB processing of fatigue samples with a single point contact LPB tool in a 4-axis CNC mill. Using CNC positioning, the tool path is controlledin the LPB process so that the surface is covered with a series of passes at a separation maintained to achieve maximum compression with minimum cold working.
(No. 253) “Incorporation of Residual Stresses in the Fatigue Performance Design of Ti-6Al-4V”.
Paul S. Prevéy, President, Director of Research, Lambda Research, Inc.
N. Jayaraman, Director of Materials Research, Lambda Research, Inc.
Ravi A. Ravindranath, Propulsion & Power, Naval Air Systems Command (NAVAIR)
Proceedings of the International Conference on Fatigue Damage of Structural Materials V, Hyannis, MA, Sept. 19-24, 2004
The high cycle fatigue (HCF) performance of turbine engine components has long been improved by the introduction of a surface layer of compressive residual stress, usually by shot peening. However, credit has not been taken for the improved fatigue performance in component design; rather shot peening is used primarily as an additional safe guard against fatigue failure. Recently, laser shock processing (LSP) and low plasticity burnishing (LPB®) have been shown to provide spectacular fatigue and damage tolerance improvement by introducing deep or through-thickness compression in fatigue critical areas. These new processes have been introduced primarily to improve an existing inadequate design, and credit for the fatigue benefits is not taken in the initial design. This paper describes a design methodology and testing protocol to take credit for beneficial residual stresses in component design to achieve a required or optimal fatigue performance. A protocol has been developed for designing a residual stress distribution using surface treatments to achieve a targeted HCF performance. The protocol is applied to a 1st stage Ti-6Al-4V compressor blade to provide the optimal leading edge damage tolerance. The use of finite element modeling (FEM), linear elastic fracture mechanics, and x-ray diffraction (XRD) mapping of the residual stress field to develop an LPB® generated residual stress distribution is described. A novel adaptation of the traditional Haigh diagram to estimate the compressive residual stress magnitude for optimal fatigue performance is introduced. Fatigue results on both blade-edge feature samples and fretting damaged samples with various kf are compared with analytical predictions provided by the design methodology. (See the full paper)
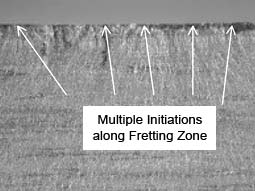
Crack initiation sites in Ti-6Al-4V
Optical fractograph showing typical crack initiation sites from fretting damage in Ti-6Al-4V.
(No. 252) “HCF Performance and FOD Tolerance Improvement in Ti-6Al-4V Vanes with LPB® Treatment”.
Paul S. Prevéy, President, Director of Research, Lambda Research, Inc.
N. Jayaraman, Director of Materials Research, Lambda Research, Inc.
Ravi A. Ravindranath, Propulsion & Power, Naval Air Systems Command (NAVAIR)
Proceedings of the 42nd AIAA Aerospace Sciences Meeting & Exhibit, Reno, NV, Jan. 5-8, 2004
Mechanical surface treatments that introduce a layer of residual surface compression improve high cycle fatigue (HCF) performance. If the depth of compression extends through the thickness of blade or vane edges, foreign object damage (FOD) tolerance can be dramatically improved. The effect of low plasticity burnishing (LPB®) on the HCF performance and FOD tolerance of a first stage Ti-6Al-4V turbine engine vane have been investigated in both tension-tension (R=0.1) and fully revered bending (R=-1). Actual vanes from fielded engines and blade-edge feature samples were fatigue tested with FOD simulated by EDM notches. The fatigue strength for LPB® processed blades increased over 4-fold for both vanes and vane-edge feature specimens with FOD 0.020 in. deep, and was undiminished by 0.030in. deep FOD. Assuming a Kt = 3 HCF performance criteria, LPB® provided tolerance of FOD up to 0.10 in. deep. The beneficial through-thickness compression was retained even for compressive loading in fully reversed bending. The fatigue and FOD tolerance improvement are shown by linear elastic fracture mechanics modeling to be due to the deep stable compressive layer produced by LPB®. (See the full paper)
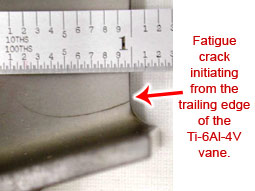
Fatigue crack in Ti-6Al-4V vane
Fatigue crack initiating from the trailing edge of the Ti-6Al-4V vane at the point of maximum stress at the trailing edge fillet.
(No. 251) “Development of Nondestructive Residual Stress Profile Measurement Methods – The Integral Method”.
Douglas J. Hornbach, VP, Director of Laboratory Operations, Lambda Research, Inc.
Paul S. Prevéy, President, Director of Research, Lambda Research, Inc.
Mark Blodgett, AFRL/MLLP
Proceedings of the Review of Progress in Quantitative Nondestructive Evaluation, Vol. 24, Eds. D.O. Thompson and D.E. Chimenti, July 25-30, 2004, Golden, CO.
A modified Integral Method was investigated as a means to nondestructively measure the subsurface residual stress distribution. The technique has been demonstrated to be feasible in aluminum alloys by comparison to established destructive measurement methods. In the current effort a thorough study of higher energy radiations was conducted to obtain deeper penetrating radiations on titanium and nickel base alloys. Higher energy radiation used in conjunction with the modified Integral Method would provide nondestructive subsurface residual stress measurement in components composed of these alloys. (See the full paper)
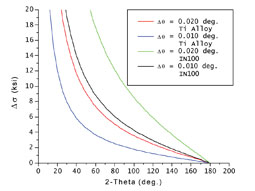
Error in measured RS vs. Bragg angle
Error in measured residual stress vs. Bragg angle for 0.01 and 0.02 deg. error in fitted peak position for Ti alloys.
(No. 250) “Mitigation of SCC and Corrosion Fatigue Failures in 300M Landing Gear Steel using Mechanical Suppression”.
Paul S. Prevéy, President, Director of Research, Lambda Research, Inc.
N. Jayaraman, Director of Materials Research, Lambda Research, Inc.
Neal Ontko, Team Lead, Materials & Test, AFRL/MLSC
Dr. Michael J. Shepard, Materials Research Engineer, AFRL/MLSC
Robert Ware, Structural Failure Analysis, AFRL/MLSC
Jack E. Coate, Mechanical Engineer, AFRL/MLSC
Proceedings of the 6th Aircraft Corrosion Workshop, August 24-27, 2004, Solomons, MD
300M steel is widely used in landing gear because of its unique combination of ultra high strength with high fracture toughness. However, 300M is vulnerable to both corrosion fatigue and stress corrosion cracking (SCC) failures with catastrophic consequences for aircraft landing gear. Plating and shot peening surface treatments currently used to extend life are only partly effective. A surface treatment is needed that will mitigate foreign object damage (FOD), corrosion fatigue and stress corrosion cracking. This paper describes the use of low plasticity burnishing (LPB®) to mechanically suppress stress sensitive corrosion failure mechanisms in 3.5% salt solution. The fatigue and corrosion fatigue performance of LPB® processed 300M steel was compared with shot peened (SP) and low stress ground (LSG) conditions. LPB® produced residual compression to a depth of 1.27 mm (0.050 in.), and shot peening only 0.127 mm (0.005 in.), an order of magnitude less. LPB® treatment dramatically improved both the HCF performance and corrosion fatigue strength, with and without simulated FOD. The corrosion fatigue strengths of LSG and SP surfaces decreased dramatically, to only 20% and50%, respectively, of the baseline strength, with no discernible endurance limit behavior under corrosion fatigue conditions. The fatigue behavior was even worse with FOD, simulated with a 0.5 mm (0.020 in.) deep EDM notch, both in air and exposed to salt. In contrast, LPB® treated specimens with FOD exhibited a definite endurance limit of 1035MPa (150 ksi) even under corrosion fatigue conditions. SCC testing of LPB® treated landing gear sections at 1030 to 2270 MPa (150 to 180 ksi) static loads was terminated after 1500 hrs without failure, compared to failure in as little as 13 hours without treatment. Mechanistically, the effect of corrosion and FOD resulted in early crack initiation and growth, thus resulting in dramatic decrease in fatigue performance. Despite the existence of similar corrosion conditions, the deep compressive surface residual stresses from LPB® treatment mitigated both the individual and synergistic effects of corrosion fatigue and FOD. The deep compressive layer produced by LPB® reduced the surface stress well below the SCC threshold for 300M, even under high tensile applied loads, effectively mechanically suppressing the SCC failure mechanism. (See the full paper)
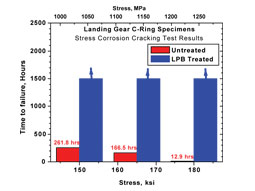
Stress corrosion cracking test results
Stress corrosion cracking (SCC) test results indicate the deep surface compressive stresses from LPB fully mitigate SCC. Results show that the untreated baseline material had SCC time to failure of 261.8 hrs at 150 ksi (1034 MPa), 166.5 hrs at 165 ksi (1138 MPa) and 12.9 hrs at 180 ksi (1241 MPa), respectively. The LPB treated specimens did not fail even after 1500 hrs of exposure at all three stress levels. In fact, when thespecimens were loaded to higher stress levels in the hope of getting them to crack by SCC, instead of cracking, the specimens were severely bent at higher loads.
(No. 249) “The Influence of Surface Enhancement by Low Plasticity Burnishing on the Corrosion Fatigue Performance of AA7075-T6”.
Paul S. Prevéy, President, Director of Research, Lambda Research, Inc.
J.T. Cammett, U.S. Naval Aviation Depot, Cherry Point, NC,
USA International Journal of Fatigue, Elsevier Science Ltd., Ed. Prof. K.L. Reifsnider, Vol 26/9, pp 975-982, Sept. 2004
Conventional approaches to mitigate corrosion related failure mechanisms in aircraft usually involve isolation from the corrosive environment via protective coatings, alloy substitution, or modifications in design to reduce stresses. This paper describes an alternate approach employing surface enhancement by low plasticity burnishing (LPB®) to eliminate or reduce the surface tensile stresses necessary for corrosion fatigue failure in AA7075-T6, without alteration of environment, material or component design. The restoration of fatigue performance by LPB® processing of AA7075-T6 after severe pitting in salt fog was previouslydescribed. This paper describes benefits of introducing a deep compressive residual stress by LPB® on fatigue strength after salt fog pitting and corrosion fatigue (under active corrosion) performance. Since LPB® processing was performed in a conventional CNC machining center, it offers a cost effective and practical alternative to alloy substitution or component re-design as a means of improving the structural integrity of aging aircraft. (See the full paper)
AA7075-T6 with Al2O3 corrosion
Macroscopic appearance of a 7075-T6 specimen after 100-hr. salt fog exposure showing patches of Al2O3 corrosion product.
(No. 248) A Design Methodology to Take Credit for Residual Stresses in Fatigue Limited Designs
Dr. N. Jayaraman, Director of Materials Research, Lambda Technologies
Paul S. Prevéy, CEO, Director of Engineering, Lambda Technologies
Residual Stress Effects on Fatigue and Fracture Testing, Ed. J.O. Bunch, M.R. Mitchell, ASTM, Lancaster, PA STP1497, Pgs. 69-84, January 2007
High cycle fatigue (HCF) performance of turbine engine components has been known for decades to benefit from compressive surface residual stresses produced by shot peening. Recently laser shocking and low plasticity burnishing (LPB®) have been shown to provide spectacular fatigue and damage tolerance improvement by introducing deep or through-thickness compression in fatigue critical areas. However, the lack of a comprehensive design method that defines the depth and magnitude of compression required to achieve a design fatigue life has prevented surface enhancement from being used for more than a safeguard against HCF damage initiation. The present paper describes a design methodology and testing protocol to allow credit to be taken for the beneficial compression introduced by surface enhancement in component design to achieve a required or optimal fatigue performance. A detailed design method has been developed that relates the required fatigue life, the mean and alternating applied stresses, and the damage in terms of Kf to the residual stress at the fatigue initiation site required for the targeted HCF performance. The method is applied to feature specimens designed to simulate the fatigue conditions in the trailing edge of a 1st stage low pressure Ti-6-4 compressor vane to provide the optimal trailing edge damage tolerance. A novel adaptation of the traditional Haigh diagram to estimate the compressive residual stress magnitude for optimal fatigue performance is introduced. Fatigue results on blade-edge feature samples are compared with analytical predictions provided by the design methodology. (See the full paper)
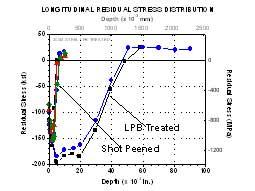
Failure of a DEB feature specimen
Failure of a DEB feature specimen with LPB treatment showing initiationin a remote area in spite of the presence of 0.5 mm (0.020 in.) FOD (arrows) on both edges of the specimen. R=-1, σmax = 480 MPa (70 ksi,) Nf = 174,315 cycles.
(No. 247) “Low Plasticity Burnishing (LPB®) Treatment to Mitigate FOD and Corrosion Fatigue Damage in 17-4 PH Stainless Steel”.
Paul S. Prevéy, President, Director of Research, Lambda Research, Inc.
N. Jayaraman, Director of Materials Research, Lambda Research, Inc.
Ravi A. Ravindranath, Propulsion & Power, Naval Air Systems Command (NAVAIR)
Proceedings of the Tri-Service Corrosion Conference, Las Vegas, NV, Nov. 17-21, 2003
The benefits of applying low plasticity burnishing (LPB®) to 17-4PH Stainless Steel (H1100) on both the fatigue and corrosion fatigue performance were compared with the shot peened (SP) and low stress ground (LSG) conditions. LPB® treatment dramatically improved both the high cycle fatigue (HCF) performance and fatigue strength. The baseline LSG and SP treatments showed similar fatigue strengths of about 150 ksi (~1035 MPa), while LPB® treatment improved the fatigue strength by about 30%. Introduction of an EDM notch of ao = 0.010 in. (0.25 mm) and co = 0.030 in. (0.75 mm) simulating a semi-elliptical surface foreign object damage (FOD), decreased the fatigue strength of both SP and LSG by nearly 80%, while LPB® helped retain much of the fatigue strength at the levels comparable to baseline material without FOD. Corrosion fatigue strength (in the presence of active corrosion medium of 3.5% NaCl solution) of the LSG material showed a drop of nearly 33% from the baseline material without corrosion; LPB® material showed corrosion fatigue strength nearly the same as the baseline material without corrosion. While the introduction of a simulated FOD on the LSG dramatically decreased the fatigue strength to less than 15 ksi (~100 MPa), LPB® retained nearly 90% of the fatigue strength of the baseline material without corrosion. Mechanistically, the effect of corrosion and FOD resulted in early crack initiation and growth, thus resulting in a dramatic decrease in fatigue performance. Despite the existence of similar corrosion conditions, the deep compressive surface residual stresses from LPB® treatment helped to mitigate the individual and synergistic effects of corrosion fatigue and FOD. (See the full paper)
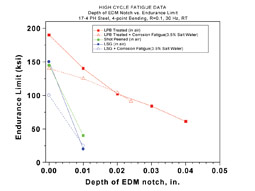
HCF & Corrosion fatigue performance
HCF and Corrosion fatigue performance as a function of EDM notch depth in 17-4 PH SS-H1100
(No. 246) “Application of Low Plasticity Burnishing (LPB®) to Improve the Corrosion Fatigue Performance and FOD Tolerance of Alloy 450 Stainless Steel”.
N. Jayaraman, Director of Materials Research, Lambda Research, Inc.
Paul S. Prevéy, President, Director of Research, Lambda Research, Inc.
Proceedings Tri-Service Corrosion Conference, Las Vegas, NV, Nov. 17-21, 2003
The potential corrosion fatigue performance benefit of applying low plasticity burnishing (LPB®) to alloy 450 stainless steel (UNS S45000) was investigated. Damage tolerance and aggressive corrosion fatigue were simulated. The LPB® process was optimized to produce nominally 0.035 in. (0.9 mm) of compression in the alloy 450 stainless steel. LPB® increased the HCF endurance limit for corrosion fatigue (in an acidic salt solution environment) by nominally 60%, from 100 ksi (~700 MPa) to nearly 160 ksi (~1100 MPa). LPB® processing of bars with EDM notching to a depth of 0.01 in. (0.25 mm) (to simulate erosion/foreign object damage (FOD) followed by corrosion fatigue increased the corrosion fatigue strength by a factor of 8, from 15 to 125 ksi (~100 to860 MPa). Increased FOD size up to 0.03 in. (0.75 mm) only nominally decreased the corrosion fatigue performance. LPB® surface enhancement provides substantially improved corrosion fatigue life and damage tolerance in alloy 450 stainless steel through deep surface compressive residual stresses. Mechanistically, the effect of corrosion and FOD resulted in early crack initiation and growth, and dramatically decreasing the fatigue performance. Despite the existence of similar corrosion conditions, the deep compressive surface residual stresses from LPB® treatment helped to mitigate the individual and synergistic effects of corrosion fatigue and FOD. (See the full paper)
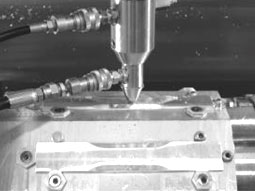
LPB processing of Alloy 450 SS
A set of 8 thick section specimens being LPB processed in a 4-axis CNC milling machine.
(No. 245) “Mitigation of FOD and Corrosion Fatigue Damage in 17-4 PH Stainless Steel Compressor Blades with Surface Treatment”.
Paul S. Prevéy, President, Director of Research, Lambda Research, Inc.
N. Jayaraman, Director of Materials Research, Lambda Research, Inc.
Ravi A. Ravindranath, Propulsion & Power, Naval Air Systems Command (NAVAIR)
Proceedings of the 9th National HCF Conference, Pinehurst, NC, Mar. 16-19, 2004
Compressor blades of a military aircraft turbine engine made of 17-4 PH stainless steel have been reported to have blade edge foreign object damage (FOD), corrosion pitting, and erosion damage that reduce fatigue life. This paper reports the findings of a comprehensive investigation of the effect of residual compressive stresses, imparted by various surface treatments, to improve leading edge damage tolerance and active corrosion fatigue performance in a salt water environment. Initial fatigue and corrosion fatigue tests were conducted in feature specimens designed to simulate the geometrical conditions of thick section and blade leading edges of compressor blades. The FOD tolerance and corrosion fatigue performance of 17-4PH prepared by low plasticity burnishing (LPB®), shot peening (SP), and low stress grinding (LSG) were compared. LPB® dramatically improved both high cycle fatigue (HCF) and corrosion fatigue performance, providing tolerance of 0.040 in. deep FOD in thick section and 0.050 in. deep leading edge FOD. Shot peening afforded little benefit in the presence of FOD 0.010 in. deep. Fatigue initiation at relatively low applied stress levels originating from existing corrosion pits outside of the LPB® treated zone limited the ability to test the surface treatments on actual fielded T56 blades retired from service. In the absence of prior pitting, LPB® provided 0.020 in. deep FOD tolerance on new T56 blades. Both the damage tolerance and active corrosion fatigue performance of 17-4PH in salt water increased with the depth of the compressive zone produced. (See the full paper)
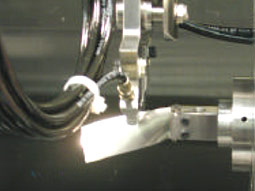
LPB processing of the leading edge
LPB extends the service life and eliminates the premature replacement costs of the 17-4 PH Stainless Steel 1st Stage Compressor Blade. By providing a deep surface layer of high magnitude compression, LPB mitigates the fatigue debit associated with active salt-water corrosion fatigue and delays the initiation and early propagation of fatigue cracks from FOD.
(No. 244) “Improved HCF Performance and FOD Tolerance of Surface Treated Ti-6-2-4-6 Compressor Blades”.
Paul S. Prevéy, President, Director of Research, Lambda Research, Inc.
N. Jayaraman, Director of Materials Research, Lambda Research, Inc.
Dr. Michael J. Shepard, Materials Research Engineer, AFRL/MLSC
Proceedings of the 9th National HCF Conference, Pinehurst, NC, Mar. 16-19, 2004
High cycle fatigue (HCF) strength and the resistance to foreign object damage (FOD) can be improved by the use of mechanical surface treatments like shot peening and low plasticity burnishing (LPB®) to introduce beneficial surface layers of compressive residual stress. In this paper, results from an extensive study of the relative effects of these two surface treatments on the residual stress, cold work distributions, HCF performance, and FOD tolerance of alloy Ti-6Al-2Sn-4Zr-6Mo (Ti-6-2-4-6) are presented. The compressive layer produced by LPB® is shown to be stable even after thermal exposure to 371C. Blade-edge bending fatigue specimens were designed to simulate the leading edge of an integral bladed rotor (IBR) compressor blade. FOD was simulated by controlled size notches introduced on the specimens using electrical discharge machining (EDM). Both disk and blade simulation specimens with 0.5 mm (0.020 in) deep FOD had HCF strengths after LPB® over 4-times higher than 8A shot peening. The HCF performance after LPB® was relatively unaffected by FOD up to 0.75 mm (0.030 in) deep. FOD up to 2.5 mm (0.10 in) in depth after LPB® decreased the fatigue strength only nominally. If the traditional design criterion of Kt (notch sensitivity factor) of 3 were to be used, LPB® effectively mitigated FOD damage up to 2.5 mm (0.10 in) deep. (See the full paper)
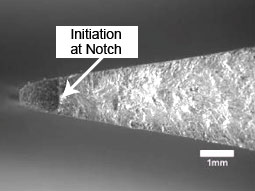
Fractograph for blade edge
Typical optical fractograph for blade edge feature specimen – LPB + Thermal Exposure + 0.050 in FOD, Max. Stress : 50 ksi, Nf = 609,295 cycles. In blade edge specimens, through-thickness compression on the order of –1100 MPa (–160 ksi) was achieved through the use of Low Plasticity Burnishing – LPB.
(No. 243) “Introduction of Residual Stress to Enhance Fatigue Performance in the Initial Design”.
Paul S. Prevéy, President, Director of Research, Lambda Research, Inc.
N. Jayaraman, Director of Materials Research, Lambda Research, Inc.
Ravi A. Ravindranath, Propulsion & Power, Naval Air Systems Command (NAVAIR)
Proceedings of Turbo Expo 2004, Vienna, Austria, Jun. 14-17, 2004
High cycle fatigue (HCF) performance of turbine engine components has been known for decades to benefit from compressive surface residual stresses introduced through shot peening. However, credit for the fatigue benefits of shot peening has not been taken into account in the design of components. Rather shot peening has been used primarily to safe guard against HCF damage initiation. Recently, laser shock processing (LSP) and low plasticity burnishing (LPB®) have been shown to provide spectacular fatigue and damage tolerance improvement by introducing deep (through-thickness) compression in critical areas. Until now, the fatigue benefits of these new surface treatments have been introduced during repair to improve an existing design. The present paper describes a design methodology and testing protocol* to take appropriate credit for the introduction of beneficial residual stresses into a component design to achieve optimal fatigue performance. (See the full paper)
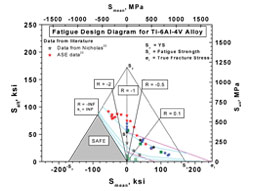
Fatigue Design Diagram for Ti-6Al-4V
The Fatigue Design Diagram – FDD analysis provides a means of incorporating compressive residual stress distributions into the designsof metallic components necessary to achieve optimal fatigue performanceand to mitigate typical damage conditions.
(No. 242) “Mitigation of Active Corrosion Fatigue and Corrosion Pit Initiated Fatigue in AA7075-T6 with Low Plasticity Burnishing”.
Paul S. Prevéy, President, Director of Research, Lambda Research, Inc.
N. Jayaraman, Director of Materials Research, Lambda Research, Inc.
J.T. Cammett, U.S. Naval Aviation Depot, Cherry Point, NC
USA Proceedings of ASIP Conference, Savannah, GA, Dec. 2-4, 2003
Corrosion related fatigue failures of aluminum structural alloys adversely impact the structural integrity of aging aircraft. A chemically active environment, susceptible material and alternating tensile stresses are all required for failure. Conventional mitigation strategies isolate the corrosive environment with coatings, change the alloy or heat treatment, or reduce the applied stress by redesign, all expensive solutions. This paper describes an alternate approach, employing surface enhancement by low plasticity burnishing (LPB®) to introduce a deep, stable layer of compressive residual stress to eliminate the tensile stresses necessary for failure without altering environment, material or design. (See the full paper)
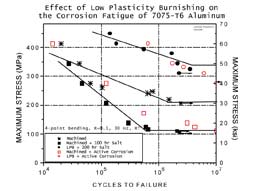
LPB effect on corrosion fatigue
The S/N curves generated for 7075-T6 in both the baseline (as-machined)and LPB conditions, after 100 hr salt fog exposure or active corrosion fatigue.
(No. 241) “Effect of Surface Treatments on Fretting Fatigue Performance of Ti-6Al-4V”.
Dr. Michael J. Shepard, Materials Research Engineer, AFRL/MLSC
Paul S. Prevéy, President, Director of Research, Lambda Research, Inc.
N. Jayaraman, Director of Materials Research, Lambda Research, Inc.
Proceedings 8th National Turbine Engine HCF Conference, Monterey, CA, April 14-16, 2003
The fretting fatigue performance of Ti-6Al-4V after isothermal exposure was explored in test coupons in low plasticity burnished (LPB®), shot peened (SP) and electropolished (ELP) baseline conditions. The thermal stability of the compressive residual stress fields produced by SP and LPB® was investigated. In the current study, fretting fatigue data and fractography are presented along with in-depth residual stress profiles, both before and after the isothermal exposure. Surface roughness data for each of the three surface conditions are reported. (See the full paper)
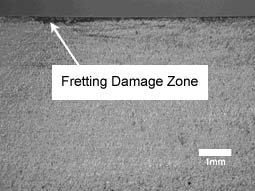
Fractograph of shot peened Ti-6Al-4V
Low magnification optical fractograph of SP treated specimen. Failure occurred from initiated cracks under the fretting scars. Note the dark band near the surface indicative of the fretting damage zone leading to acrack initiation site. (SP+Thermal+Fret Specimen 76, Smax=95 ksi, and Nf=111,093)
(No. 240) “Effect of Surface Treatments on HCF Performance and FOD Tolerance of a Ti-6Al-4V Vane”.
Paul S. Prevéy, President, Director of Research, Lambda Research, Inc.
N. Jayaraman, Director of Materials Research, Lambda Research, Inc.
Ravi A. Ravindranath, Propulsion & Power, Naval Air Systems Command (NAVAIR)
Proceedings of the 8th National Turbine Engine HCF Conference, Monterey, CA, April 14-16, 2003
Mechanical surface treatments including shot peening (SP), laser shock peening (LSP) and low plasticity burnishing (LPB®) have been shown to introduce compressive residual stresses that improve high cycle fatigue (HCF) performance and foreign object damage (FOD) tolerance. Shot peening has been widely used to introduce a shallow (<250 mm) beneficial compressive layer, at the expense of roughening and heavily cold working the surface. Minimizing cold work during surface enhancement has been shown to improve both thermal and mechanical stability of the compressive layer. Compression deeper than achievable by shot peening has been shown to dramatically improve FOD tolerance in Ti-6Al-4V. (See the full paper)
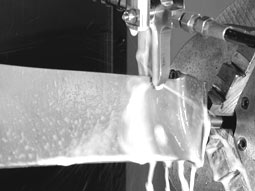
LPB processing of engine vane
LPB improves the service life of the F402 LPC1 vane by imparting through-thickness residual compression to counter the applied tensile stresses in the component.
(No. 239)”Improved Fatigue Performance of Friction Stir Welds with Low Plasticity Burnishing: Residual Stress Design & Fatigue Performance Assessment”.
Paul S. Prevéy, President, Director of Research, Lambda Technologies
Murray Mahoney, Rockwell Scientific
Proceedings of Thermec 2003, Madrid, Spain, July 7-11, 2003
Although friction stir welding (FSW) produces minimal distortion, residual stresses are created that impact fatigue and stress corrosion performance. X-ray diffraction residual stress and cold work mapping methods used at Lambda Research for FSW studies are described. Post weld surface enhancement processing can be used to place the FSW region in compression to improve fatigue performance. Deep compressive residual stress distributions produced by low plasticity burnishing (LPB®) designed to improve fatigue and corrosion fatigue performance in aluminum alloy FSW are described. The LPB® tooling and FSW processing are presented. Corrosion fatigue testing used for FSW samples is described and compared to fracture mechanics based fatigue life predictions calculated for the measured residual stress distributions. Residual stress and corrosion fatigue results for aluminum alloy 2219-T8751 are presented. (See the full paper)
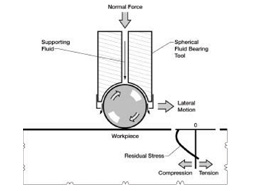
Low Plasticity Burnishing schematic
The basic LPB tool is comprised of a ball that is supported in a spherical hydrostatic bearing. A fluid is used to pressurize the bearing with a continuous flow to support the ball. As the ball rolls over the component, the pressure from the ball plastically deforms the surface of the material under the ball by a controlled amount, leaving a zone of compression in the burnished area.
(No. 238) “Case Studies of Fatigue Life Improvement Using Low Plasticity Burnishing in Gas Turbine Engine Applications”.
Paul S. Prevéy, President, Director of Research, Lambda Research, Inc.
Ravi A. Ravindranath, Propulsion & Power, Naval Air Systems Command (NAVAIR)
Dr. Michael J. Shepard, Materials Research Engineer, AFRL/MLSC
Dr. Timothy Gabb, NASA Glenn Research Center
Journal of Engineering for Gas Turbines and Power. October 2006, vol. 128, pp 865-872
Surface enhancement technologies such as shot peening, laser shock peening (LSP), and low plasticity burnishing (LPB®) can provide substantial fatigue life improvement. However, to be effective, the compressive residual stresses that increase fatigue strength must be retained in service. For successful integration into turbine design, the process must be affordable and compatible with the manufacturing environment. LPB® provides thermally stable compression of comparable magnitude and even greater depth than other methods, and can be performed in conventional machine shop environments on CNC machine tools. LPB® provides a means to extend the fatigue lives of both new and legacy aircraft engines and ground-based turbines. Improving fatigue performance by introducing deep stable layers of compressive residual stress avoids the generally cost prohibitive alternative of modifying either material or design. (See the full paper)
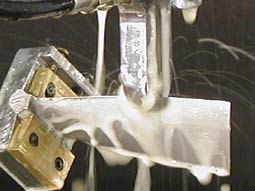
LPB processing of 17-4 PH blade
LPB extends the service life and eliminates the premature replacement costs of the 17-4 PH Stainless Steel 1st Stage Compressor Blade for the T56 Turboprop Engine.
(No. 237) “Application of Low Plasticity Burnishing to Improve Damage Tolerance of a Ti-6Al-4V First Stage Fan Blade”.
Paul S. Prevéy, President, Director of Research, Lambda Research, Inc.
Douglas J. Hornbach, VP, Director of Laboratory Operations, Lambda Research, Inc.
Ravi A. Ravindranath, Propulsion & Power, Naval Air Systems Command (NAVAIR)
J.T. Cammett, U.S. Naval Aviation Depot, Cherry Point, NC,USA
Proceedings of the 44th AIAA/ASME/ASCE/AHS Structures, Structural Dynamics, & Materials Conf., Norfolk, VA, April 7-10, 2003
This paper describes the application of Low Plasticity Burnishing (LPB®)to increase the damage tolerance and fatigue strength of a Ti-6Al-4V fan blade that is fatigue life limited by the occurrence of leading edge foreign object damage (FOD) as small as 0.1mm (0.005 in.). The size and location distributions of service generated FOD were documented; no FOD exceeded a depth of 0.5mm (0.020 in.). LPB® processing of the fan blade leading edge was therefore designed to provide tolerance of 0.5 mm deep FOD. A zone of -100 ksi through-thickness compression was achieved extending back 6.3 mm chord-wise from the leading edge along the lower half of the blade from the platform to the mid-span damper. Residual stress distributions were measured as functions of depth and position along the leading edge using x-ray diffraction mapping. HCF testing was with the leading edge cantilever loaded under a sustained mean stress (R=0.1). FOD was simulated with 60-degree “V” notches machined into the leading edge at the point of maximum applied stress. The 620 MPa (90 ksi) endurance limit of as-received blades was reduced to less than half by 0.5mm. FOD. LPB® produced an HCF strength of 861 MPa (125 ksi) without FOD, and strengths equal or greater than the as-received blades for FOD up to 1.3 mm (0.050 in.) deep – an order of magnitude improvement in damage tolerance. Fatigue life modeling confirmed the HCF strength achieved, and suggests FOD tolerance can be further increased by optimizing the size and shape of the compressive zone. (See the full paper)
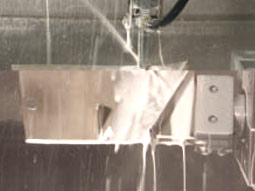
LPB processing of a Ti-6Al-4V blade
LPB substantially extends the life of Ti-6Al-4V engine blades as a result of improving FOD tolerance and increasing fatigue strength along the blade’s leading edge by imparting through-thickness residual compression.
(No. 236) “Fatigue Life Improvement of an Aluminum Alloy FSW with Low Plasticity Burnishing”.
N. Jayaraman, Director of Materials Research, Lambda Technologies
Paul S. Prevéy, President, Director of Research, Lambda Technologies
Murray Mahoney, Rockwell Scientific
Proceedings of the 132nd TMS Annual Meeting, Mar. 2-6, 2003, San Diego, CA
Friction stir welding provides a new technology for solid state joining of a wide variety of aluminum alloys that cannot be joined with conventional fusion welds. However, recent work has shown that significant tensile residual stresses are developed in the stirred region with local tension maxima at the transition between the stir and heat-affected zones. Residual tension at the edges of the stir zone has been associated with stress corrosion cracking and corrosion fatigue crack growth initiation. This fatigue debit has been overcome using low plasticity burnishing (LPB®) to introduce a deep surface layer of compressive residual stress. LPB® processing after friction stir welding has increased the high cycle fatigue endurance of aluminum alloy FSW by 80%. However, the LPB® processing parameters have not yet been optimized to produce the maximum achievable fatigue life. A linear elastic fracture mechanics approach is applied to calculate the fatigue crack growth rates and fatigue lives of friction stir welded 2219-T8751 aluminum with initiation from salt fog pitting. The analysis is performed with and without the including of the deep compressive residual stresses produced by low plasticity burnishing (LPB®). Calculated fatigue lives are compared to fatigue data developed in four-point bending at R =0.1 following 100 hr. salt fog pitting corrosion. The results indicate that the improved fatigue life achieved with LPB® after friction stir welding can be explained by delayed crack initiation and retardation of growth in the deep compressive layer produced by LPB®. The fatigue crack growth analysis provides a theoretical basis for understanding the improved fatigue life realized with LPB® and for estimating the residual stress distribution that will provide the highest achievable fatigue strength. (See the full paper)
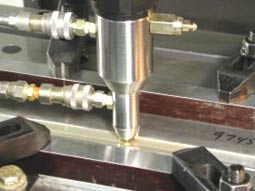
LPB of 2219-T8751 friction stir weld
Friction stir weld in the process of being low plasticity burnished on aCNC milling machine. LPB was optimized for the 2219-T8751 aluminum friction stir weld. Optimal LPB parameters were developed to impart the greatest depth and magnitude of residual stress with minimal cold work
(No. 235) “The Effect of Shot Peening Coverage on Residual Stress, Cold Work and Fatigue in a Ni-Cr-Mo Low Alloy Steel”.
Paul S. Prevéy, Lambda Research, Inc.
J.T. Cammett, U.S. Naval Aviation Depot, Cherry Point, NC,
USA Proceedings of the International Conference on Shot Peening, Garmisch-Partenkirchen, Germany, Sept. 16-20, 2002
The underlying motivation for this work was to test the conventional wisdom that 100% coverage by shot peening is required to achieve full benefit in terms of compressive residual stress magnitude and depth as well as fatigue strength. Fatigue performance of many shot peened alloys is widely reported to increase with coverage up to 100%, by many investigators and even in shot peening manuals. The fatigue strength of some alloys is reported to be reduced by excessive coverage Aerospace, automotive, and military shot peening specifications require at least 100% coverage. Internal shot peening procedures of aerospace manufacturers may require 125% to 200% coverage. Most of the published fatigue data supporting the 100% minimum coverage recommendation was developed in fully reversed axial loading or bending with a stress ratio, R= Smin / Smax, of -1. (See the full paper)
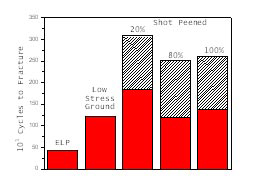
Bending fatigue lives of 4340 steel
Bending fatigue lives at 1240 MPa (180 ksi), R= 0.1, for electropolished (ELP), low stress ground (LSG) and shot peened 4340 steel peened to the coverage indicated.
(No. 234) “Improved Damage Tolerance in Titanium Alloy Fan Blades with Low Plasticity Burnishing”.
Paul S. Prevéy, Lambda Research, Inc.
Douglas J. Hornbach, Lambda Research, Inc.
Terry L. Jacobs, Lambda Research, Inc.
Ravi A. Ravindranath, Propulsion & Power, Naval Air Systems Command (NAVAIR)
Proceedings of the ASM IFHTSE Conference, Columbus, OH, Oct. 7-10, 2002
Low Plasticity Burnishing (LPB®) has been applied to produce a layer of deep high magnitude compressive residual stress in the leading edge of Ti-6Al-4V first stage fan blades. The goal was to improve damage tolerance from 0.13 to 0.5 mm (0.005 to 0.02 in.). LPB® processing of the airfoil surface was performed on a conventional four-axis CNC mill. The LPB® control system, tooling, and process are described. A zone of through-thickness compression on the order of -690 MPa (-100 ksi) was achieved extending 2.5 mm (0.10 in.) cord-wise from the leading edge and along the lower half of the blade from the platform to mid-span damper. Cantilever fatigue testing was performed at R=0.1 using FOD simulated by a 60 degree “V” notch. The processing provided complete tolerance of FOD up to nominally 1.3 mm (0.05 in.) in depth, an order of magnitude improvement in damage tolerance. The benefits of the deep layer of surface compression were confirmed through fatigue performance modeling.(See the full paper)
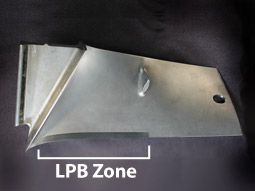
F404 engine blade with LPB zone
Photograph of a finished Ti-6Al-4V first stage fan blade showing the LPB region spanning the lower half of the leading edge.
(No. 233) “Improving Corrosion Fatigue Performance of AA2219 Friction Stir Welds with Low Plasticity Burnishing”.
Paul S. Prevéy, Lambda Research, Inc.
Douglas J. Hornbach, Lambda Research, Inc.
Perry Mason, Lambda Research, Inc.
Murray Mahoney, Rockwell Scientific
Proceedings of the ASM IFHTSE Conference, Columbus, OH, Oct. 7-10, 2002
Low Plasticity Burnishing (LPB®) has been investigated as a post-weld surface treatment to improve the corrosion fatigue performance of friction stir welded (FSW) AA2219 plate. Welds were fabricated from 9.5 mm thick AA2219-T8751 plate. Residual stress distributions mapped by x-ray diffraction through the thickness of the weld indicate zones of tension parallel to the weld line at the interface of the weld and parent metal on both the advancing and retreating sides of the weld stir zone. Maximum tension ranged from100 MPa at the surface to 200 MPa at mid-thickness. LPB® placed the weld region in high compression on the order of -400 MPa. Fatigue testing was performed in four-point bending at R=0.1 under constant stress. The corrosion fatigue performance after 100 hours in 3.5% salt fog improved from 175 MPa for a milled surface to 225 MPa after LPB® processing. LPB® provided nearly complete mitigation of the pitting corrosion damage, with comparable fatigue performance regardless of salt fog exposure. Theoretical predictions of the fatigue life improvement from LPB® are also shown and compared to the empirical fatigue data. LPB® appears to provide a practical weld post-treatment for improved corrosion fatigue performance of aluminum alloy FSW’s. (See the full paper)
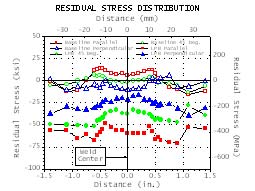
Friction stir weld RS distributions
The residual stress distributions measured as functions of depth and distance from the AA2219 friction stir weld centerline.
(No. 232) “Restoring Fatigue Performance of Corrosion Damaged AA7075-T6 and Fretting in 4340 Steel with Low Plasticity Burnishing”.
Paul S. Prevéy, Lambda Research, Inc.
J.T. Cammett, U.S. Naval Aviation Depot, Cherry Point, NC,
USA Proceedings of the 6th Joint FAA/DoD/NASA Aging Aircraft Conference, San Francisco, CA, Sept 16-19, 2002
Corrosion related fatigue in aluminum structural alloys and fretting damage in high strength steels are primary failure mechanisms that reduce the structural integrity of aging aircraft. A chemically active environment, susceptible material and static and/or alternating tensile stresses are all required for failure. Conventional approaches to mitigate corrosion and fretting related failure mechanisms address either elimination of the corrosive environment with coatings, substitution or modification of alloys, or changes in design, all expensive solutions. This paper describes an alternate approach, employing surface enhancement by low plasticity burnishing (LPB®) to introduce a deep, stable layer of compressive residual stress to eliminate the tensile stresses necessary for failure without altering either material or design. The restoration of fatigue performance by LPB® processing of severely salt fog pitted AA7075-T6 was previously described. That work has been extended to investigate the effects of introducing a deep layer of compressive residual stress with LPB® on the fatigue performance of AA7075-T6 prior to salt fog pitting, and prior to active corrosion fatigue in the absence of pitting, and prior to fretting of 4340 steel. The endurance limit of the baseline machined 7075-T6 surface was reduced from 205 MPa (30 ksi) to 103 MPa (15 ksi) by either 100 hr salt fog pitting or active corrosion in 3.5% NaCl during fatigue. LPB® prior to corrosive exposure increased the endurance limit for 100 hr pitted samples to 310 MPa (45 ksi), and for active corrosion fatigue to 275 MPa (40ksi). LPB® processing was performed in a conventional CNC machining center. LPB® prior to fretting in 4340 steel increased the HCF strength 25%, eliminating the fretting fatigue debit. Surface enhancement of fatigue critical aircraft structural components with LPB® offers a cost effective and practical alternative to alloy substitution or component re-design as a means of improving the structural integrity of aging aircraft. (See the full paper)
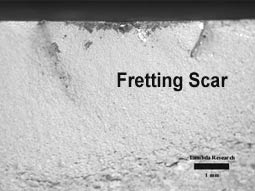
Fracture face of 4340 steel sample
Fracture face of a 4340 steel fretting fatigue sample showing initiation from the edge of the fretting scar.
(No. 231) “Damage Tolerance Improvement of Ti-6-4 Fan Blades with Low Plasticity Burnishing”.
Paul S. Prevéy, Lambda Research, Inc.
Douglas J. Hornbach, Lambda Research, Inc.
J.T. Cammett, Naval Air Systems Command (NAVAIR)
Ravi A. Ravindranath, Naval Air Systems Command (NAVAIR)
Proceedings of the 6th Joint FAA/DoD/NASA Aging Aircraft Conference, San Francisco, CA, Sept 16-19, 2002
Low plasticity burnishing (LPB®) has been demonstrated to increase the damage tolerance of Ti-6Al-4V fan blades by an order of magnitude. First stage Ti-6Al-4V fan blades were LPB® processed using a conventional 4-axis CNC machine tool. LPB® dramatically improved surface finish with negligible blade distortion and produced compressive residual stresses of -690 MPa (-100 ksi) through the entire thickness of the blade leading edge. Fatigue testing demonstrated that the deep compression of LPB® provided a 3X improvement in HCF endurance limit, complete tolerance of FOD up to 1.3 mm (0.050 in.) deep, and an order of magnitude improvement in fatigue life. Damage tolerance for the TI-6AL-4V fan blade was improved by an order of magnitude. The benefit of the LPB® generated compressive layer in improving damage tolerance was confirmed using the fatigue crack growth code AFGROW. Crack growth modeling indicates tolerance of deeper FOD is achievable with optimization of the depth and magnitude of the residual stress field. LPB® has been demonstrated to be an effective and affordable means of improving the damage tolerance of Titanium alloy fan and compressor blades. Application of LPB® during manufacturing and overhaul operations could significantly reduce the cost of engine inspection and maintenance while improving fleet readiness. (See the full paper)
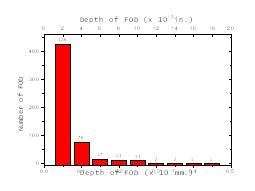
Residual stress profiles
Residual stress profiles of shot peened and LPB treated 300MHSLA steel specimens before and after 48 hours of thermal exposure to 400F.
(No. 230) “The Influence of Surface Enhancement by Low Plasticity Burnishing on the Corrosion Fatigue Performance of AA7075-T6”.
Paul S. Prevéy, Lambda Research, Inc.
John T. Cammett, U.S. Naval Aviation Depot, Cherry Point, NC, USA
Proceedings of the 5th International Aircraft Corrosion Workshop, Solomons, Maryland, Aug. 20-23, 2002
Corrosion fatigue, stress corrosion cracking and high cycle fatigue initiating from corrosion pits are primary failure mechanisms that reduce the structural integrity of aging aircraft. A chemically active environment, susceptible material and either static or alternating tensile stresses are required for failure. Conventional approaches to mitigate corrosion related failure mechanisms in aircraft usually involve isolation from the corrosive environment via protective coatings, alloy substitution or modifications in design to reduce stresses, all expensive solutions. This paper describes an alternate approach employing surface enhancement by low plasticity burnishing (LPB®) to eliminate or reduce the surface tensile stresses necessary for corrosion fatigue failure in AA7075-T6, without alteration of environment, material or component design. The restoration of fatigue performance by LPB® processing of AA7075-T6 after severe pitting in salt fog has been previously described that work has now been extended to investigate the effect on fatigue strength of introducing a deep layer of compressive residual stress by LPB® prior to salt fog pitting. The effect of prior LPB® treatment of non-corroded surfaces on subsequent corrosion fatigue performance has now also been studied. The endurance limit of the baseline machined surface was reduced from 205 MPa (30 ksi) to 103 MPa (15 ksi) by either pitting during 100 hr. salt fog exposure or from active corrosion in 3.5% NaCl during fatigue cycling. LPB® prior to exposure increased the endurance limit for 100 hr. salt fog pitted samples to 310 MPa (45 ksi) and for active corrosion fatigue samples to 275 MPa (40 ksi). LPB® processing was performed ina conventional CNC machining center. Surface enhancement of fatigue critical aircraft structural components with LPB® offers a cost effective and practical alternative to alloy substitution or component re-design as a means of improving the structural integrity of aging aircraft. (See the full paper)
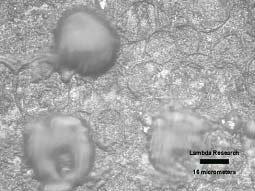
Circular patterns in surface oxide
Circular oxidation patterns at mid-width of an LPB 7075-T6 surface after 100 hr. salt fog exposure.
(No. 229) “Quality Assurance of Shot Peening by Automated Surface and Subsurface Residual Stress Measurement”.
John T. Cammett, Lambda Research, Inc.
The Shot Peener, Vol. 15(3) September 2001, pp 7-8.
Shot peening is frequently used to produce compressive residual stress in the surface layer of components for fatigue life enhancement and suppression of stress corrosion cracking (SCC). Shot peening is controlled by monitoring Almen intensity. Almen intensity is determined from the arc heights produced in series of at least four Almen strips peened for progressively longer times on one side of the strips. There is, however, no simple relationship between the Almen intensity and the residual stress distribution produced in the 1070 steel Almen strip. Archeight in Almen strips is a function of the induced total strain energy, or the area under the residual stress-depth distribution. Furthermore, quite different residual stress distributions can produce the same Almen strip arc height. Shot peening to the same Almen intensity using different shot sizes will also generally produce different subsurface residual stress distributions. The depth and magnitude of compression developed in a component being shot peened, generally having mechanical properties very different from the Almen strip, cannot be determined simply from the response of a steel Almen strip identically peened. Therefore, the only reliable method of controlling shot peening of a component is by measuring the subsurface residual stress distribution. (See the full paper)
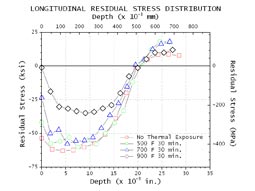
RS distributions in 1018 carbon steel
Residual stress distributions in shot peened 1018 carbon steel with a hardness of Rb 80.
(No. 228) “Fatigue Strength Restoration in Corrosion Pitted 4340 Alloy Steel via Low Plasticity Burnishing”.
John T. Cammett, Lambda Research, Inc.
Paul S. Prevéy, Lambda Research, Inc.
Low plasticity burnishing (LPB®) is a surface enhancement process with significant economic and physical attributes that make it attractive for component repair/refurbishment applications in aging aircraft. The current work addresses the efficacy of fatigue strength restoration by applying LPB® directly to a corroded surface without first removing damaged layers. Compressive residual stresses of the order of material yield strength in quenched and tempered, 38 HRC 4340 steel were achieved via LPB® on as-corroded surfaces and sub-surface layers. The total depth of compression was about 1.25 mm (0.05 in.).Corrosion damage from 100 and 500-hour salt fog exposures reduced the 107-cycle fatigue strength respectively by about 25 and 50 percent relative to the as machined uncorroded fatigue strength. LPB® applied to the corroded surfaces after superficial cleaning to remove loose corrosion product restored the fatigue strength of the 100-hour exposed material to 110 percent of the as-machined, uncorroded level. Fatigue strength restoration was 85 percent in 500-hour exposed material. Similar degrees of fatigue strength restoration were achieved in the finite life regime as well. Fractography revealed that fatigue failures of salt fog-exposed specimens initiated at corrosion pits. Fatigue failures in LPB® treated corroded specimens also initiated at corrosion pits. Nonetheless, fatigue strengths were greatly improved by such treatment. (See the full paper)
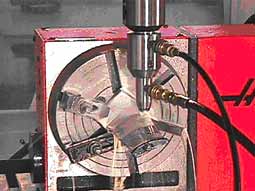
LPB tool in four-axis operation
LPB tool being used in four-axis mode while performing LPB on a compressor blade in a 20 HP vertical CNC mill.
(No. 227) “Iterative Taguchi Analysis: Optimizing the Austenite Content and Hardness in 52100 Steel”.
Perry W. Mason, Lambda Research, Inc.
Paul S. Prevéy, Lambda Research, Inc.
Journal of Materials Eng. & Perf., Vol. 10(1), February 2001, ASM, Materials Park, OH, pg. 14-21.
Three iterations of Taguchi designed experiments and analyses were used to determine optimal thermal treatments for minimizing retained austenite content while maximizing Rockwell hardness (HRC) in AISI 52100 bearing steel. Experimental variables chosen for this study included austenitizing and tempering temperatures, tempering time and cold treatment. After one iteration, tempering temperature and cold treatment were seen to have the greatest effect on austenite content while austenitizing and tempering temperatures had the greatest influence on hardness. After the second and third experimental iterations, two thermal treatments were noted each producing hardness of 58-59 HRC in combination with zero retained austenite as measured by x-ray diffraction. (See the full paper)
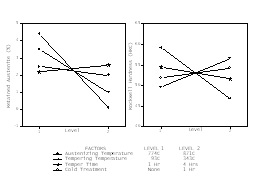
Response data for Taguchi DOE A
Plot of Response Data for Main Factors of Taguchi DOE A.
(No. 226) “The Effect of Low Plasticity Burnishing (LPB®) on the HCF Performance and FOD Resistance of Ti-6Al-4V”.
Paul S. Prevéy, Lambda Research, Inc.
Proceedings of the 6th National Turbine Engine HCF Conference, March 5-8, 2001, Jacksonville, FL
Low Plasticity Burnishing (LPB®) has been developed as a rapid, inexpensive surface enhancement method adaptable to existing CNC machine tools. LPB® produces a deep layer of compression with minimal cold work of the surface, comparable to laser shock peening (LSP), but can be incorporated into manufacturing operations at lower cost. Minimizing cold work during surface enhancement has been shown to improve both thermal stability at engine temperatures and resistance to overload relaxation accompanying foreign object damage (FOD).Recent research leading to the development of a practical LPB® demonstration facility and tooling is described. The mechanism for compressive residual stress development during LPB® has been studied with elastic-plastic finite element modeling. DOE methods have been utilized to optimize compressive magnitude and depth with minimum cold work. Using optimum burnishing parameters, compression on the order of the material yield strength can be achieved to depths exceeding 0.040 in. (1mm) with low cold work. Residual stress and cold work distributions developed by LPB® in Ti-6Al-4V are compared to traditional shot peening and LSP. The compressive layer produced by LPB® is shown to be resistant to both thermal and overload relaxation. After exposure to engine temperatures, the high cycle fatigue (HCF) strength at 2×10⁶ cycles after LPB® is 40% higher than 8A shot peening. FOD 0.010 in. deep reduces the HCF strength of shot peened Ti-6Al-4V by 50% but has no significant effect on fatigue life after LPB®. HCF life improvement and FOD tolerance are attributed to the deep compressive layer produced by LPB®. (See the full paper)
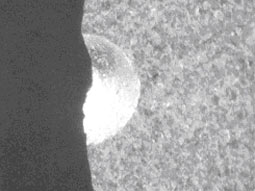
Fatigue initiation site in SP Ti-6Al-4V
Fatigue initiation site in shot peened Ti-6Al-4V heat treated at 425C (797F) for 10 hours with 0.010 in. FOD.
(No. 225) “The Effect of Prior Cold Work on Tensile Residual Stress Development in Nuclear Weldments”.
Douglas J. Hornbach, Lambda Research, Inc.
Paul S. Prevéy, Lambda Research, Inc.
Journal of Pressure Vessel Technology. Vol. 124, Issue 3, Aug. 2002, pp 359-365
Austenitic alloy weldments in nuclear reactor systems are susceptible to stress corrosion cracking (SCC) failures. SCC has been observed for decades and continues to be a primary maintenance concern for both pressurized water and boiling water reactors. SCC can occur if the sum of residual stress and applied stress exceeds a critical threshold tensile stress. Residual stresses developed by prior machining and welding can accelerate or retard SCC depending on their sign and magnitude. The residual stress, cold work and yield strength distributions on the inside diameter of an Alloy 600 tube J-welded into a pressure vessel were determined by a combination of x-ray diffraction (XRD) and mechanical techniques. A novel method was used to relate the XRD line broadening to the percent cold work or true plastic strain in the Alloy 600 tube. The accumulated cold work in the layers deformed by prior machining, in combination with the true stress-strain relationship for Alloy 600, was used to determine the increase in yield strength as a result of deformation due to machining and weld shrinkage. The yield strength of the deformed layer was found to be well in excess of the bulk yield for the alloy, and is therefore capable of supporting residual stresses correspondingly higher. Tension as high as +700 MPa, exceeding the SCC threshold stress, was observed in both the hoop and axial directions on the inside diameter of the Alloy 600 tubing adjacent to the weld heat affected zone (HAZ). The cold worked high tensile zones correlated with the locations of field SCC failures. The tensile residual stresses are shown to result from a combination of the high cold working from initial machining followed by weld shrinkage. The development of surface tension during weld shrinkage has been modeled using finite element methods, and the benefits of minimizing or removing the cold worked layer prior to welding are demonstrated. Further laboratory studies showing the influence of prior cold working on the formation of residual stresses following bulk plastic deformation are presented. (See the full paper)
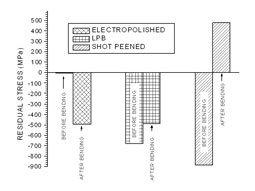
Comparison of XRD surface RS
Comparison of XRD surface residual stress before and after tensile plastic deformation of Alloy 718 beam samples showing an inversion from compression to tension on highly cold worked shot peened sample.
(No. 224) “X-ray Diffraction Characterization of Crystallinity and Phase Composition in Plasma-Sprayed Hydroxylapatite Coatings”.
Paul S. Prevéy, Lambda Research, Inc.
Journal of Thermal Spray Technology, ed. C.C. Berndt, Metals Park, OH, ASM, Vol. 9(3), Sept, 2000, pp. 369-376.
Orthopedic and dental implants consisting of a metallic substrate plasma-spray coated with hydroxylapatite (HA) are currently used in reconstructive surgery. The crystalline phases present in the calcium phosphate ceramic and the degree of crystallinity must be controlled for medical applications. X-ray diffraction (XRD) is routinely employed to characterize the phase composition and percent crystallinity in both biological and sintered HA. However, application of the same XRD methods to plasma-sprayed coatings is complicated by the potential presence of several crystalline contaminant phases and an amorphous component. To overcome the complexities of characterizing plasma-sprayed HA coatings, an external standard method of XRD quantitative analysis has been developed that can be applied nondestructively. Data collection and reduction strategies allowing separation of intensity diffracted from commonly occurring phases and the amorphous fraction are presented. The method is applied to coating samples, and detection limits and sources of error are discussed. Repeatability and accuracy are demonstrated with powder mixtures of known composition. (See the full paper)
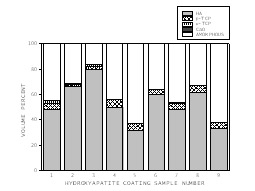
Range of phases in plasma spray
Bar chart showing the range of amorphous glassy calcium phosphate phaseand contaminate phases in nine (9) plasma spray coating specimens representing a range of commercial and experimental coatings.
(No. 223) “The Effect of Cold Work on the Thermal Stability of Residual Compression in Surface Enhanced IN718”.
Paul S. Prevéy, Lambda Research, Inc.
20th ASM Materials Solutions Conference & Exposition, St. Louis, MO: ASM, 2000, pp 426-434.
Surface enhancement, the creation of a layer of residual compression at the surface of a component, is widely used to improve the fatigue life in the automotive and aerospace industries. The compressive layer delays fatigue crack initiation and retards small crack propagation. The benefits of surface enhancement are lost if the compressive layer relaxes at the operating temperature of the component. Surface enhancement methods producing minimal cold work are shown to produce the most thermally stable compression. The residual stress and cold work distributions developed in IN718 by shot peening, gravity peening, laser shock peening (LSP) and low plasticity burnishing (LPB®) are compared. Estimation of cold work (equivalent true plastic strain) from x-ray diffraction line broadening is described. Thermal relaxation at temperatures ranging from 525C to 670C is correlated to the degree of cold working of the surface, independent of the method of surface enhancement. Highly cold worked (> 15%) shot peened surfaces are found to relax to half the initial level of compression in minutes at all temperatures investigated. The rapid initial relaxation is shown to be virtually independent of either time or temperature from 525C to 670C. The LPB® process is described with application to IN718. High cycle fatigue performance after elevated temperature exposure is compared for surfaces treated by LPB® and conventional (8A intensity) shot peening. (See the full paper)
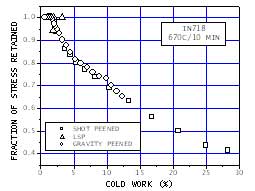
Cold work in SP, LSP and GP IN718
Correlation of cold work and fraction of stress retained in shot peened, laser shock peened and gravity peened IN718 after 10 minutes at 670C.
(No. 222) “Low Cost Corrosion Damage Mitigation and Improved Fatigue Performance of Low Plasticity Burnished 7075-T6”.
Paul S. Prevéy, Lambda Research, Inc.
Proceedings of the 4th International Aircraft Corrosion Workshop, Solomons, MD, Aug. 22-25, 2000
Low plasticity burnishing (LPB®) has been investigated as a surface enhancement process and corrosion mitigation method for aging aircraft structural applications. Compressive residual stresses reaching the alloy yield strength and extending to a depth of 1.25 mm (0.050 in.), deeper than typical corrosion damage, is achievable. Excellent surface finish can be achieved with no detectable metallurgical damage to surface and subsurface material. Salt fog exposures of 100 and 500 hrs. reduced the fatigue strength at 2×10⁶ cycles by fifty-percent. LPB® of the corroded surface, without removal of the corrosion product or pitted material, restored the 2×10⁶ fatigue strength to greater than that of the original machined surface. The fatigue strength of the corroded material in the finite life regime (104 to 106 cycles) after LPB® was 140 MPa (20 ksi) higher than the original uncorroded alloy, and increased the life by an order of magnitude. Ease of adaptation to CNC machine tools allows LPB® processing at costs and speeds comparable to machining operations. LPB® offers a promising new technology for mitigation of corrosion damage and improved fatigue life of aircraft structural components with significant cost and time savings over current practices. (See the full paper)
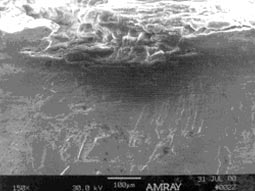
Fatigue origin at corrosion pit
Microscopic appearance of the fatigue origin at the site of corrosion pit after 100 hr. salt for exposure.
(No. 221) “FOD Resistance and Fatigue Crack Arrest in Low Plasticity Burnished IN718”.
Paul S. Prevéy, Lambda Research, Inc.
Jack Telesman, NASA Glenn Research Center
Timothy Gabb, NASA Glenn Research Center
Peter Kantzos, NASA Glenn Research Center
Proceedings of the 5th National Turbine Engine High Cycle Fatigue Conference, Chandler, AZ, March 7-9, 2000
Surface enhancement methods induce a layer of residual compressive stress to improve fatigue life. Shot peening is inexpensive and widely used, but the associated cold work accelerates relaxation of the compressive layer at turbine temperatures and increases sensitivity to overload relaxation. “Deep rolling” burnishing methods produce deep compression, but with cold work comparable to shot peening. Laser shock peening (LSP)produces deep compression with minimal cold work and impressive FOD resistance, but is costly and presents logistical problems in manufacturing. Low Plasticity Burnishing (LPB®) has been investigated as a rapid, inexpensive surface enhancement method. Preliminary results indicate depth and magnitude of compression comparable to LSP. Compression reaching the alloy yield strength and extending to a depth of 1.2 mm (0.047 in.) is achievable with cold work of less than 4%. Excellent surface finish can be achieved with no detectable metallurgical damage. Ease of adaptation to CNC machine tools allows LPB® processing at costs and speeds comparable to machining operations. The LPB® process is described with application to IN718. Thermal stability at engine temperatures is compared to conventional shot peening. Resistance to 0.13 and 0.25 mm (0.005 and .010 in.) deep sharp notch FOD was achieved, even after exposure to engine temperatures. Elevated temperature crack growth data are presented showing the arrest of existing 0.46 mm x 0.91 mm (0.018 x 0. 036 in.) fatigue cracks by the deep compressive layer. (See the full paper)
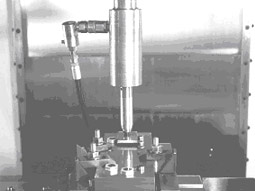
LPB processing of an IN718 coupon
LPB tool positioned for burnishing a coupon in a 20 HP vertical CNC mill
(No. 220) “Development of Machining Procedures to Minimize Distortion During Manufacture”.
Douglas J. Hornbach, Lambda Research, Inc.
Paul S. Prevéy, Lambda Research, Inc.
Heat Treating, Proceedings of the 17th Heat Treating Society Conference and Exposition, ASM, Metals Park, OH, (1998), pp.13-18.
Distortion during machining can result in high scrap rates and increased manufacturing costs. Distortion results from either the introduction or elimination of residual stresses during manufacture. Residual stresses which are induced in the surface by machining and grinding , or throughout the body by welding or heat treatment, can generally be measured and controlled. Distortion caused by re-equilibration after removal of stressed material during machining is more difficult to avoid, and is the primary cause of scrap in precision components. Heat treatment required to develop desired mechanical properties will generally produce residual stress distribution. During machining, the distortion of a part depends upon the geometry, order of removal, and stress state in the material removed. If the change of shape which occurs is not accommodated, the part may be scrapped during machining. Measurement of the initial residual stress distribution and the use of finite element modeling allow the development of machining procedures which minimize distortion. Examples of the residual stress distributions typically seen in heat treated components and the development of finite element models to minimize distortion are presented. Control of distortion is demonstrated with a detailed example of machining a nickel-base superalloy turbine disk from a quenched forging. (See the full paper)
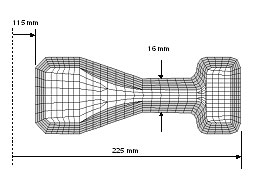
FEM of forging geometry
Finite element model of forging geometry with gray elements indicating material to be removed, and white elements signifying the final disk geometry.
(No. 219) “Thermal Residual Stress Relaxation and Distortion in Surface Enhanced Gas Turbine Engine Components”.
Paul S. Prevéy, Lambda Research, Inc.
Douglas J. Hornbach, Lambda Research, Inc.
Perry W. Mason, Lambda Research, Inc.
Proceedings of ASM Materials Week, Indianapolis, IN, September 15-18, 1997
Compressive residual stresses are often deliberately induced in the surfaces of turbine engine components, using a variety of surface enhancement methods, to improve fatigue life. Thermal stress relaxation can occur in both the Ti and Ni alloys used in compressor and turbine stages. Nonuniform relaxation of the compressive layer can cause distortion of the critical aerodynamic shapes of thin blades, potentially effecting engine performance. A detailed study of the thermal relaxation of the layer of compression induced by shot peening, gravity peening and laser shocking in Ti-6Al-4V and Inconel 718 at engine temperatures is summarized. Both the magnitude and rate of relaxation were found to depend primarily on the degree of cold working developed during processing. Compression in highly cold worked surfaces relaxed extremely rapidly in both alloys. Half the initial compression may be lost in less than 10 minutes even at moderate engine temperatures. Finite element estimates of the distortion resulting from nonuniform thermal relaxation in a hypothetical airfoil geometry is presented. (See the full paper)
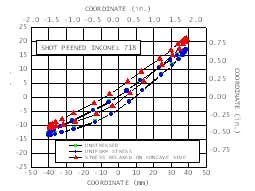
Airfoil cross section distortion
Airfoil cross section distortion of shot peened Inconel 718 FEA model.
(No. 218) “Residual Stresses in OTSG Tube Expansion Transitions”.
P.A. Sherburne, Framatone Technologies, Inc.
D.J. Hornbach, Lambda Research, Inc. R.A. Ackerman, Toledo Edison CompanyA.R. McIlree, Electric Power Research Institute Proceedings of the
Eighth International Symposium on Environmental Degradation of Materials in Nuclear Power Systems – Water Reactors, NACE, TMS, Amelia Island, FL, August 10-14, 1997.
A section of once through steam generator (OTSG) tubing, approximately 33 cm. long and encompassing the roll expansion region in the upper tube sheet (hot leg), was removed from the Davis Besse Nuclear Power Station in April 1996 for laboratory failure analysis. Rotating pancake coil (RPC) inspection of this region had determined that an axial defect was present in the expansion transition approximately 2.5 cm below the primary face of the hot leg tube sheet. Examination of the pulled tube section identified the defect as an ID-initiated primary water stress corrosion crack (PWSCC) approximately 78% through wall and 2.3 mm long. Additional axial cracks with less through wall extent were also observed within the roll transition. During fabrication, OTSGs were subjected to a full-vessel stress relief at 593° – 621°C for ~12 to 15 hours. This practice was shown in early testing to reduce the residual stresses caused by roller expansion. Operating experience for OTSG tubing has demonstrated that it is more resistant to stress corrosion cracking than low temperature mill annealed Alloy 600 tubing used in early recirculating-type steam generators. Thus, the appearance of PWSCC in this tube was not expected. A review of manufacturing records for the Davis Besse OTSGs revealed that this specific tube end had been repaired following stress relief and hydrotest operations. It was not clear from the records, however, if the tube had been rerolled as part of the repair procedure. Based on this uncertainty, a project was initiated to measure the residual stress distribution and cold work in the Davis Besse roll transition and in assorted rolled tube mockups, using X-ray diffraction techniques and finite element analysis. The objective was to determine if the Davis Besse tube had been rerolled following stress relief and thus more likely to experience PWSCC. Results confirm a definite effect of rerolling the tube following stress relief on both cold work and residual stresses. It was further concluded that the Davis-Besse tube data has a high degree of correlation with the reroll data. (See the full paper)
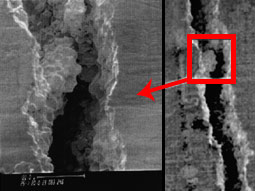
Primary defect in OTSG tubing
Primary defect in Davis-Besse Nuclear Power Station – Once through steam generator (OTSG) Tube No. 58/119, after bending (10X).
(No. 217) “Tensile Residual Stress Fields Produced in Austenitic Alloy Weldments”.
Douglas J. Hornbach, Lambda Research, Inc.
Paul S. Prevéy, Lambda Research, Inc.
Proceedings of Energy Week Conference & Exhibition, Houston, TX, January 28-30,1997, American Society of Mechanical Engineers, American Petroleum Institute, pp. 183- 188.
Residual stresses developed by prior machining and welding may either accelerate or retard stress corrosion cracking (SCC), in austenitic alloys, depending upon their magnitude and sign. A combined x-ray diffraction (XRD) and mechanical technique was used to determine the axial and hoop residual stress and yield strength distributions into the inside diameter surface of a simulated Alloy 600 penetration J-welded into a reactor pressure vessel. The degree of cold working and the resulting yield strength increase caused by prior machining and weld shrinkage were calculated from the line broadening distributions. Tension as high as +700 MPa was observed in both the axial and hoop directions at the inside diameter adjacent to the weld heat affected zone (HAZ). Stresses exceeding the bulk yield strength develop due to the combined effects of cold working of the surface layers during initial machining, and subsequent weld shrinkage. Cold working produced by prior machining was found to influence the final residual stress state developed by welding. (See the full paper)
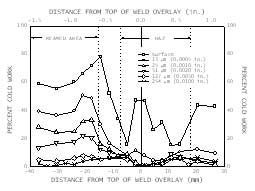
Complex cold work distributions
Variation in degree of cold work (equivalent accumulated true plastic strain) with axial displacement and depth in the HAZ and machined regions of the low angle side of 50 deg. Alloy 600 J-weld mockup.
(No. 216) “Experimental Residual Stress Evaluation of Hydraulic Expansion Transitions in Alloy 690 Steam Generator Tubing”.
Rod McGregor, Babcock & Wilcox International
Doug Hornbach, Lambda Research, Inc.
Usama Abdelsalam, McMaster University
Paul Doherty, Babcock & Wilcox
International Proceedings of the Seventh International Symposium on Environmental Degradation of Materials in Nuclear Power Systems – Water Reactors, NACE, Breckenridge, CO, August 7-10, 1995.
Residual stresses developed by prior machining and welding may either accelerate or retard stress corrosion cracking (SCC), in austenitic alloys, depending upon their magnitude and sign. A combined x-ray diffraction (XRD) and mechanical technique was used to determine the axial and hoop residual stress and yield strength distributions into the inside diameter surface of a simulated Alloy 600 penetration J-welded into a reactor pressure vessel. The degree of cold working and the resulting yield strength increase caused by prior machining and weld shrinkage were calculated from the line broadening distributions. Tension as high as +700 MPa was observed in both the axial and hoop directions at the inside diameter adjacent to the weld heat affected zone (HAZ). Stresses exceeding the bulk yield strength develop due to the combined effects of cold working of the surface layers during initial machining, and subsequent weld shrinkage. Cold working produced by prior machining was found to influence the final residual stress state developed by welding.(See the full paper)
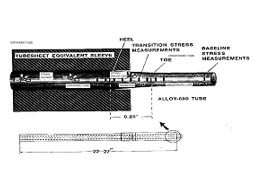
Generator tubesheet secondary-side
In a steam generator, the transition region between the expanded and unexpanded tube has been particularly problematic because of its higher tensile residual stresses and its location at the tubesheet secondary-side where it is exposed to corrosive conditions.
(No. 215)”Effect of Prior Machining Deformation Upon the Development of Tensile Residual Stresses in Weld Fabricated Nuclear Components”.
Paul S. Prevéy, Lambda Research, Inc.
Perry W. Mason, Lambda Research, Inc.
Douglas J. Hornbach, Lambda Research, Inc.
James P. Molkenthin, Lambda Research, Inc.
Journal of Materials Engineering and Performance, Vol. 5, 1, February 1996, pp. 51-56.
Austenitic alloy weldments in nuclear systems may be subject to stress corrosion cracking (SCC) failure if the sum of residual and applied stresses exceeds a critical threshold. Residual stresses developed by prior machining and welding may either accelerate or retard SCC, depending upon their magnitude and sign. A combined x-ray diffraction and mechanical procedure was used to determine the axial and hoop residual stress and yield strength distributions into the inside diameter surface of a simulated Alloy 600 penetration J-welded into a reactor pressure vessel. The degree of cold working and the resulting yield strength increase caused by prior machining and weld shrinkage was calculated from the line broadening distributions. Tensile residual stresses on the order of +700 MPa were observed in both the axial and hoop directions at the inside diameter surface in a narrow region adjacent to the weld heat affected zone (HAZ). Stresses exceeding the bulk yield strength were found to develop due to the combined effects of cold working of the surface layers during initial machining, and subsequent weld shrinkage. The residual stress and cold work distributions produced by prior machining were found to strongly influence the final residual stress state developed after welding. (See the full paper)
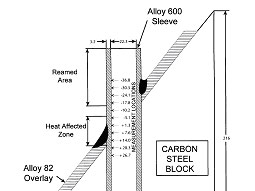
Alloy 600 50-deg. heater sleeve
Alloy 600 50-deg. heater sleeve penetration J-weld mockup specimen geometry. Several J-weld heater sleeve mockups were prepared to simulateas accurately as possible the actual fabrication procedures used in thepressure vessel penetrations which had experienced stress corrosion cracking in service.
(No. 214) “Current Applications of X-ray Diffraction Residual Stress Measurement”.
Paul S. Prevéy, Lambda Research, Inc.
Developments in Materials Characterization Technologies, eds. G.F. Vander Voort and J.J. Friel, Materials Park, OH: American Society of Metals, pp. 103-110.
A brief theoretical development of x-ray diffraction residual stress measurement is presented emphasizing practical engineering applications of the plane-stress model, which requires no external standard. Determination of the full stress tensor is briefly described, and alternate mechanical, magnetic, and ultrasonic methods of residual stress measurement are compared. Sources of error arising in practical application are described. Subsurface measurement is shown to be necessary to accurately determine the stress distributions produced by surface finishing such as machining, grinding, and shot peening, including corrections for penetration of the x-ray beam and layer removal. Current applications of line broadening for the prediction of material property gradients such as yield strength in machined and shot peened surfaces, and hardness in steels are presented. The development of models for the prediction of thermal, cyclic, and overload residual stress relaxation are described. (See the full paper)
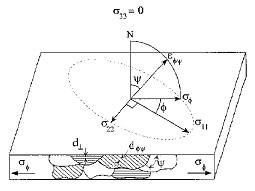
Plane stress at a free surface
Plane stress at a free surface showing the change in lattice spacing with tilt ψ for a uniaxial stress σφ parallel to one edge.
(No. 213) “X-Ray Diffraction Characterization of Residual Stress and Hardness Distribution in Induction Hardened Gears”.
Douglas J. Hornbach, Lambda Research, Inc.
Perry W. Mason, Lambda Research, Inc.
Paul S. Prevéy, Lambda Research, Inc.
Proceedings of the First International Conference on Induction Hardened Gears and Critical Components, Indianapolis, IN, May 15-17, 1995, Gear Research Institute, pp. 69-76.
Accurate knowledge of the subsurface residual stress and hardness distributions is required for failure analysis, fatigue life prediction and process control of induction hardened components. X-ray diffraction (XRD) provides a powerful tool for the simultaneous determination of both the macroscopic residual stress and hardness distributions through the case and into the core of induction hardened parts. A procedure for developing the empirical relationship between diffraction peak width and mechanical hardness is described. Subsurface XRD residual stress measurement requires layer removal and correction for the resulting stress relaxation. The corrections may dominate the results obtained at depths near the case/core interface. Traditional closed-form corrections may be inadequate when applied to gear teeth. A novel finite element analysis (FEA) correction technique applicable to arbitrary geometries and stress distributions is presented and described. Examples of the determination of the residual stress and hardness distributions through the case of induction hardened gears are presented. (See the full paper)
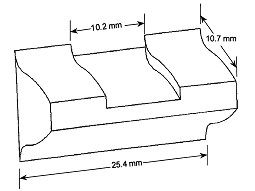
Layer removal zone in FEM
Nominal dimensions of layer removal zone used in finite element modeling.
(No. 212) “Measurement of Residual Stresses in Alloy 600 Pressurizer Penetrations”.
J.F. Hall, ABB-CE
J.P. Molkenthin, ABB-CE
P.S. Prevéy, Lambda Research, Inc.
R.S. Pathania, EPRI
Conference on the Contribution of Materials Investigation to the Resolution of Problems Encountered in Pressurized Water Reactors, Paris: Societe Francaise d’Energie Nucleare, Sept. 12-16, 1994.
Alloy 600 penetrations in several pressurized water reactors have experienced primary water stress corrosion cracking near the partial penetration J-welds between the Alloy 600 and the cladding on the inside diameter of the components. The microstructure and tensile properties indicated that the Alloy 600 was susceptible to primary water stress corrosion cracking (PWSCC) providing that a high tensile stress (applied + residual) was present. The residual stress distributions at the inside diameter surface and at different depths below the surface were measured in Alloy 600 nozzle and heater sleeve mockups. Surface residual stresses on the nozzle mockup ranged from -350 to +830 MPa. For the heater sleeve mockup, the surface residual stresses ranged from -330 to +525 MPa. In the areas of high tensile residual stress, for the most part, the residual stresses decreased with increasing depth below the surface. For the nozzle and heater sleeve mockups, the percent cold work and yield strength as a function of depth were determined. (See the full paper)
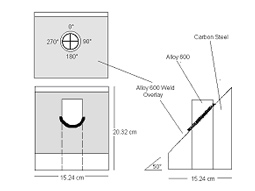
Alloy 600 Heater Sleeve
Alloy 600 Heater Sleeve in the Pressurizer Head (50°).
(No. 211) “XRD Residual Stress Measurements on Alloy 600 Pressurizer Heater Sleeve Mockups”.
J.F. Hall, ABB-CEJ.P. Molkenthin, ABB-CE
P.S. Prevéy, Lambda Research, Inc.
Proceedings of the Sixth International Symposium on Environmental Degradation of Materials in Nuclear Power Systems-Water Reactors, San Diego, CA, 1993, TMS, ANS, NACE, pp. 855-861.
Alloy 600 penetrations in several pressurized water reactors have experienced primary water stress corrosion cracking near the partial penetration J-welds between the Alloy 600 and the cladding on the inside diameter of the components. The microstructure and tensile properties indicated that the Alloy 600 was susceptible to primary water stress corrosion cracking (PWSCC) providing that a high tensile stress (applied + residual) was present. The residual stress distributions at the inside diameter surface and at different depths below the surface were measured in two Alloy 600 heater sleeve mockups. Surface residual stresses ranged from 340 to 690 MPa. For the most part, the residual stresses decreased with increasing depth below the surface. For the heater sleeve mockups, the percent cold work(i.e. true plastic strain) and yield strength as a function of depth were determined. As a result of pre-reaming and welding the heater sleeves, the amount of plastic strain and yield strength increased to a nominal depth of 0.025 cm. The true plastic strain and yield strength decreased with increasing depth below the surface. (See the full paper)
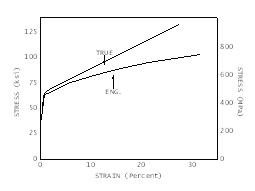
True stress-strain curves for Alloy 600
Engineering and true stress-strain curves for Alloy 600 heater sleeve material.
(No. 209) “Problems with Non-Destructive Surface X-Ray Diffraction Residual Stress Measurement”.
Paul S. Prevéy, Lambda Research, Inc.
Practical Applications of Residual Stress Technology, ed. C. Ruud, Materials Park, OH: American Society for Metals, 1991, pp. 47-54.
Because surface measurements are non-destructive, x-ray diffraction is often considered as a method of residual stress measurement for quality control testing. Unfortunately, errors caused by the presence of a subsurface stress gradient as well as difficulties in interpreting surface results often limit the usefulness of surface data. The magnitude of the potential errors, both in measurement and in interpretation, depends upon the nature of the subsurface residual stress distribution which can only be determined destructively. Although residual stress distributions subject to these problems are commonly encountered in practice, the question of the validity of non-destructive surface results is seldom adequately considered. Examples are presented showing common residual stress distributions produced by grinding, nitriding and shot peening which are subject to errors in measurement and/or interpretation when measured only at the surface. The methods for determining the subsurface residual stress distributions and correction for penetration of the x-ray beam are discussed along with examples of their application. The need to determine the subsurface stress distribution in order to verify the accuracy of surface measurements is emphasized. (See the full paper)
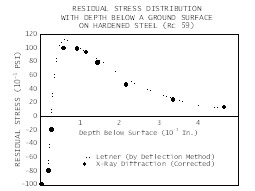
RS distribution in ground steel
Residual stress distribution with depth below a ground surface on hardened steel.
(No. 208) “The Use of X-Ray Diffraction to Determine the Triaxial Stress State in Cylindrical Specimens”.
Paul S. Prevéy, Lambda Research, Inc.
Perry W. Mason, Lambda Research, Inc.
Practical Applications of Residual Stress Technology, ed. C. Ruud, Materials Park, OH: American Society for Metals, 1991, pp. 77-81.
A method of determining the axial, circumferential and radial residual stress distributions in cylindrical specimens is described. The axial and circumferential residual stresses are measured directly by x-ray diffraction at the free cylindrical surface exposed by machining and electropolishing. The radial stress component is then calculated from an integral of the circumferential stress at the free surface as a function of depth by the method of Moore and Evans. The method is applicable only to cylindrical samples with rotationally symmetrical stress distributions from which complete cylindrical shells are removed for subsurface measurement. The method does not require prior knowledge of the stress-free lattice spacing, and thus provides a means of verifying neutron and x-ray diffraction methods of full tensor stress determination. The stress -free lattice constant, do, is also calculated as a function of depth from the sum of the principal stresses. Application of the method, to determine the triaxial residual stress distribution in an induction hardened 1045 steel multi-axial fatigue specimen, is described. The variation in the stress-free lattice spacing of the (211) planes with depth is estimated through the hardened case and into the core material. (See the full paper)
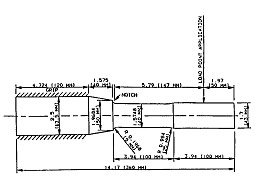
SAE 1045 steel fatigue sample
SAE 1045 steel induction hardened multi-axial fatigue sample.
(No. 207) “Residual-Stress Distributions Produced by Strain-Gage Surface Preparation”.
Paul S. Prevéy, Lambda Research, Inc.
Proceedings of the 1986 SEM Spring Conference on Experimental Mechanics, Society for Experimental Mechanics, Inc., Bethel, CT, (1986) pp. 216-223.
Abrasion of a metallic surface to improve bonding during strain gage installation is generally thought to produce negligible effect on the measurement of applied or residual stresses by blind hole drilling. However, residual stresses induced by surface abrasion may affect residual stress measurements in shallow subsurface layers of residual stress fields produced by processes such as grinding and shot peening. The residual stress and cold work distributions produced by four methods of abrasive surface preparation and etching were studied by x-ray diffraction in fully annealed AISI 1018 steel. Abrasion of the surface was found to alter the residual stresses near the sample surface. The surface residual stresses produced by abrasion ranged from tension to compression with magnitudes as high as 80% of the yield strength. Cold work was induced to depths of 20 to 60 mm. Etching produced low magnitude surface stresses and negligible cold work. (See the full paper)
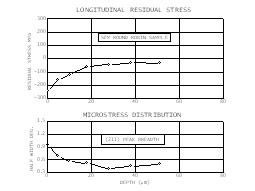
RS on 1018 steel SEM sample
Longitudinal residual stress and (211) peak breadth distributions produced by strain-gage installation on a 1018 steel SEM round-robin sample.
(No. 206)”A Method of Determining the Elastic Properties of Alloys in Selected Crystallographic Directions for X-Ray Diffraction Residual Stress Measurement”.
Paul S. Prevéy, Lambda Research, Inc.
Advances in X- Ray Analysis, Vol. 20, ed. H.F. McMurdie, New York, NY: Plenum Press, 1977, pp. 345-354.
A technique and apparatus are described for obtaining the elastic constant E/(1+v) in selected crystallographic directions for the purpose of calibrating x-ray diffraction residual stress measurement methods. The preparation of a simple rectangular beam specimen with two active electrical resistance strain gages applied to the test surface is described. Samples are clamped in a diffractometer fixture designed to minimize displacement errors, and loaded in four-point bending to several stress levels below the proportional limit. A method is described for calculating E/(1+v) and an estimate of the experimental error. Values of E/(v+1) obtained for several alloy-(hkl) combinations are presented. The results indicate that several alloys of current commercial interest exhibit significant elastic anisotropy. (See the full paper)
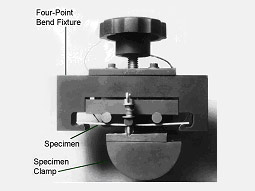
Four-Point Bending Apparatus
When positioned in the four-point bending apparatus, the samples were stressed to approximately 5%, 40%, and 75% of the yield strength of the alloy.
(No. 205) “The Use of Pearson VII Distribution Functions in X-Ray Diffraction Residual Stress Measurement”.
Paul S. Prevéy, Lambda Research, Inc.
Advances in X-Ray Analysis, Vol. 29, ed. C.S. Barrett, New York, NY: Plenum Press, 1986, pp. 103-111.
The fitting of a parabola by least squares regression to the upper portion of diffraction peaks is commonly used for determining lattice spacing in residual stress measurement. When Ka techniques are employed, the presence of the Ka doublet is shown to lead to significant potential error and non-linearities in lattice spacing as a function of Sin2y caused by variation in the degree of blending of the doublet. An algorithm is described for fitting Pearson VII distribution functions to determine the position of the Ka1 component, eliminating errors caused by defocusing of diffraction peaks of intermediate breadth. The method is applied to determine the subsurface residual stress distribution in ground Ti-6Al-4V, comparing directly the use of parabolic and Pearson VII peak profiles, and is shown to provide precision better than 1% in elastic constant determination. (See the full paper)
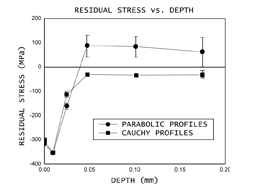
Ground Ti-6Al-4V
The residual stress distributions, showing the mean value and standard deviations, are presented for both parabolic and Cauchy profiles as functions of depth.
(No. 203) “Surface Residual Stress Distributions in As-Bent Inconel 600 U-Bend and Incoloy 800 90-Degree Bend Tubing Samples”.
Paul S. Prevéy, Lambda Research, Inc.
Workshop Proceedings: U-Bend Tube Cracking in Steam Generators, Electric Power Research Institute, Palo Alto, CA, 1981, pp. 12-3 to 12-19.
Selected data showing typical macroscopic residual stress distributions in u-bent Inconel 600, and 90 deg. bends in Incoloy 800 are presented. The results indicate regions of both high magnitude tension and compression in the longitudinal direction around the circumference of the bends at the apex. The microscopic residual stress, or percent plastic strain and macroscopic residual distributions in the surface of cross-roll straightened and ground Inconel 600 tubing are described. The results indicate a compressive surface layer accompanied by a yield strength gradient from 90 ksi at the surface to 30 ksi at a depth of 0.003 in. (See the full paper)
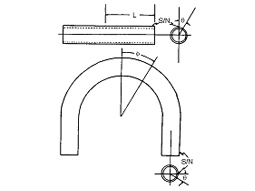
System for stress measurement
The coordinate system used for defining the stress measurement sites on bent tubing samples.
(No. 202) “X-Ray Diffraction Characterization of Residual Stresses Produced by Shot Peening”.
Paul S. Prevéy, Lambda Research, Inc.
Shot Peening Theory and Application, series ed. A. Niku-Lari, IITT-International, Gournay-Sur-Marne, France, 1990, pp. 81-93.
A brief overview of the theory and practice of x-ray diffraction residual stress measurement as applied to shot peened materials is presented. The unique ability of x-ray diffraction methods to determine both the macroscopic residual stress and the depth and magnitude of the cold worked layer produced by shot peening is described. The need to obtain a complete description of the subsurface residual stress distribution, in order to accurately characterize the residual stress distributions produced by shot peening, is emphasized. Non-destructive surface residual stress measurements are shown to generally be inadequate to reliably characterize the residual stresses produced by shot peening. Practical applications of x-ray diffraction methods for quality control testing are considered. Examples are presented for steel and nickel base alloys. (See the full paper)
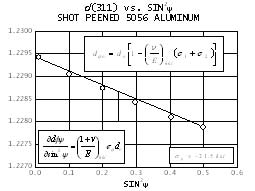
Residual stress profiles
Residual stress profiles of shot peened and LPB treated 300MHSLA steel specimens before and after 48 hours of thermal exposure to 400F.
(No. 201) “The Uniformity of Shot Peening Induced Residual Stress”.
Paul S. Prevéy, Lambda Research, Inc.
Residual Stress for Designers and Metallurgists, ed. L.J. Vande Walle, Metals Park, OH: American Society for Metals, 1981, pp. 151-168.
Two rectangular samples of ASTM SA 508 Class 2 steel, stress relieved and shot peened to 14-16A intensity, were examined in detail to determine the principal macroscopic residual stress distribution. The uniformity of the shot peening induced macroscopic residual stresses with orientation in the plane of the surface and as a function of depth were examined and compared. The microscopic residual stress (plastic deformation) distribution was determined as a function of depth, and compared for the two samples. The calibration technique to determine the single crystal elastic constants in the (211) direction and verification of the values obtained by comparison with mechanically measured applied stress are discussed. The results indicate variation in the magnitude of the subsurface compressive macroscopic residual stress with direction in the plane of measurement for either sample of less than 12 ksi. The mean value of the macroscopic stress distributions for the two samples examined differed by less than the same amount at any depth examined. The microstress distribution was found to vary essentially linearly as a function of depth, reaching a negligible amount immediately beneath the microscopically compressive surface layer. The microstress distributions in the two samples examined were identical within the limits of experimental error. (See the full paper)
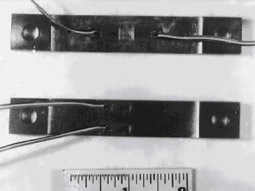
“Stiff-back” specimen
A “stiff-back” specimen which could be loaded directly in tension was instrumented with strain gages on both sides of the region irradiated during x-ray diffraction applied stress measurement.
(No. 200) “X-Ray Diffraction Residual Stress Techniques”.
Paul S. Prevéy, Lambda Research, Inc.
Metals Handbook: 2019 Edition, Vol. 10, ed. K. Mills, Metals Park, OH: American Society for Metals, 2019, https://doi.org/10.31399/asm.hb.v10.a0006632.
This article provides a detailed account of x-ray diffraction (XRD) residual-stress techniques. It begins by describing the principles of XRD stress measurement, followed by a discussion on the most common methods of XRD residual-stress measurement. Some of the procedures required for XRD residual-stress measurement are then presented. The article provides information on measurement of subsurface stress gradients and stress relaxation caused by layer removal. The article concludes with a section on examples of applications of XRD residual-stress measurement that are typical of industrial metallurgical, process development, and failure analysis investigations undertaken at Lambda Research. (See the full paper)
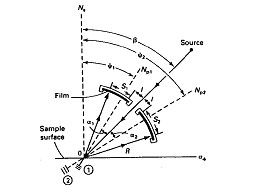
Residual stress profiles
Residual stress profiles of shot peened and LPB treated 300MHSLA steel specimens before and after 48 hours of thermal exposure to 400F.
(No. 99) “Residual Stress Measurement for Quality Control of Shot Peening”.
Lambda Research, Inc.
The magnitude and depth of the layer of compressive residual stress produced by shot peening is critical to achieving increased component fatigue strength. Although the Almen strip provides a practical means of monitoring the intensity of shot peening, the Almen strip arc height depends upon the area under the stress-depth plot, and is not sufficient to guarantee both the magnitude and depth of the residual stress distribution produced. The subsurface stress distribution must be measured for reliable quality control of shot peening. The best developed and most accurate means of measuring shot peening residual stress distributions with depth is by x-ray diffraction (XRD). XRD procedures have been established by the SAE, and have been widely used since the 1970’s for the determination of subsurface stress distributions in automotive and aerospace applications. (See the full paper)
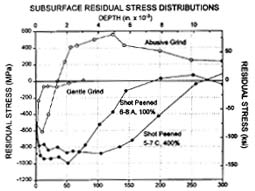
Comparable surface stresses
Comparable surface stresses produced by radically different processing showing the need for subsurface measurement.

